Pretty Nostalgic 'Live by our Motto' feature

If you have never heard of Pretty Nostalgic magazine, you are missing out! We were asked last November to contribute our thoughts to a feature for the new year and we finally managed to get a hold of a copy and check out what else the issue had to offer. 

The magazine is available to buy from their website and a limited number (growing) of independent retailers. Their website is really lovely too, we spent some time looking around it whilst waiting for our issue to arrive (which it did very quickly). 

We were asked to way-in on the subjects 'Spend wisely, Waste less, Appreciate more' that make up Pretty Nostalgic's motto. We could have spoken about this all day but we managed to get our points across in three small paragraphs which have all been featured in the six page spread, along with other bloggers, writers and readers of the magazine.

There are some really lovely articles, as well as the one we are in, in this edition. Particularly one about British shoe makers and Nicole Burnett talking about her love of repaired objects and the sad loss of making do and mending simple household goods.

If you like vintage for the history, not just the fashion factor and like seeing real artisans at work whilst being enchanted by beautiful photography, take some time out to get a copy. Then sit down on a Sunday afternoon with a big cup of tea and enjoy.

H and Sammy xxx


Don't miss a thing, follow us on Bloglovin, Like us on Facebook and come chat with us on Twitter @livelovemake

How We Wear...Winter Coats

We are starting a new series for the new year. 'How we wear' will be H and I showing you a little peek into our wardrobes, we are by no means fashion bloggers, but we both have quite different styles when it comes to clothes, despite shopping in mostly the same places. We thought it would be interesting to see how each other styled a particular piece each month. 
For January it is winter coats. 

H says: I am so glad my friend Jen persuaded me to buy this coat on a recent shopping trip, Yellow is not normally a colour I would choose but I love the colour blue so it actually compliments a lot of my wardrobe. It is so cosy and adds a great pop of colour to any outfit.  I wear boots all the time in the winter and the studded straps on these give them a 'rock chick' feel which I love.

H wears: Coat by Miss Selfridge, Jeans and boots by Dorothy Perkins (similar here) , Black Jumper and scarf by H&M.

Sammy says: I bought this coat on the hottest day of the year back in August. I had been looking for a duffel style coat for ages and the colour of this one was perfect (It matches my hair!) It is so warm so I have to keep it for truly chilly days. I really struggle to find boots that will fit my calves so New Look's wide fit range are a blessing. I love the taupe colour of these, they go with everything!

 Sammy wears: Coat by Primark, Boots by New Look (wide fit) Dress by New Look Inspire (Similar here), Scarf by River Island, Nail Varnish by Essie 'It's Genius' Rings by Accessorize.

Make it: Wrap Bracelet

I have been lusting after one of these multi Wrap bracelets for ages and yet they are so expensive and so I thought I must have the skills and the tools to be able to make my own and voilĂ , a tutorial is born!

You will need:  Scissors, Superglue (or other strong glue), thin waxed cord, embroidery thread, needle, a button (not in the picture), beads (I chose a combination of 4 different shades of blue - of course), clipboard (or like me, a piece of mount board and a big bulldog clip!)

First, things first.  You will need to find the right length of cord for your bracelet.  If you wrap the cord around your wrist the amount of times you want your bracelet to be, then add some extra for fastening, say about 10cm at least.  Then double that length to make the sides of your bracelet.  Measure the embroidery thread - you will need it to be at least twice as long as your cord.

Next pop a button at the bend of the cord and tie a knot to keep it in place.  You may want to pop a bit of glue onto the knot so that it stays put.  Wait for the glue to dry before going any further.

Put the button under the bulldog clip/clipboard so that it will keep it firmly in place whilst you are making the bracelet.  Separate the two cords and so you have a left and right side - I found it easier to put clips on the bottom of the board aswell to keep these two sides separate and to stop them moving around.

Tie the embroidery thread onto the left cord at the top by the button knot, again a little glue helps it to stay in place.  Then thread a needle onto the other end of your embroidery thread.

Here comes the complicated bit, but once you have it, its a simple repetitive few steps.

From the left hand side put a bead on your thread and pull through, making sure the bead sits in-between the cords. The thread then goes over the top of the right cord and then around and underneath before going back through the bead and underneath the left cord, and pull through - making sure the bead stays in-between the two cords.  

For your next bead, you will just bring the cord up and around the left cord, through the bead and over the right thread, around, underneath and back through the bead and so on.  Keep repeating that same few steps until you come to near the end of your cord (I left about 8cm at the end of the cord).  Knot the embroidery thread on one side of the cord, again pop a bit of glue on the knot to fix it and trim the excess. 

Tie a knot in the cord at the end of your beads to keep it all in place and then leave a gap (for your button to go through) and then tie another knot so that the button will snuggly fit in the gap.  If you are making this bracelet for a friend you may want to do 2 sets of gaps so that they have the option of different lengths. 

Then you are done!  You will end up with a great present to give someone or a lovely treat for yourself.

I have always had a bit of a thing about long wrap bracelets and I really enjoyed making this one.  I think I might make another one with slightly larger beads and a longer length as I think more layers would look great. What do you think? What colour beads would you choose?

H

We would love to see if you have a go at these. Like with all our DIY's if you do, take a pic and share it with us on Twitter or instagram with the hashtag #livelovemake

Understanding a Dress Pattern Part 3


Welcome to part 3 of 'Understanding a Dress Pattern' this week we are going through what's inside of the envelope. Having followed all the information in the first two parts about how to choose your pattern and how to find out what you need, lets get stuck in to how to make your garment.

Inside the envelope you will find the pattern instructions and the pattern tissue pieces.

The Pattern Instructions
If you take out your instructions the first page will show you line drawings of all the designs, a drawing of all the pieces and which design they belong too. From this you can sort out which pattern pieces you need to cut from the tissue pieces.

Next to that there will usually be a glossary of terms and directions. If you are new to patterns it is a good idea to have a thorough read of this before you start, it is always there for you to refer back to if there is something you don't understand.

Underneath all that will be your cutting lay outs, the blueprints if you like for where you need to place your pieces on your fabric. Again there will be options for different widths of fabric and sometimes sizes. Find the layout that is relevant to you and use that to place your pattern.

The Pattern Tissue
Having read the first part of your instructions, you can unfold your pattern tissue and roughly cut the pieces you need for your chosen design. Although, I usually don't cut the tissue, to make my patterns last longer I use greaseproof paper and trace over the pieces to create copies, leaving the original intact.

This just means that I can always go back to the pattern at another time and make a different size or variation and not have cut away anything I may need. (If you choose to copy, make sure you are accurate and that you copy all the information that you need from each piece) The markings on a pattern can be overwhelming as there are so many with multi sized patterns, but if you have read your glossary it will become clearer. you can always refer to that if you are unsure.

Back to the Instructions
The next step is to start following the instructions, I usually go through them and mark (in pencil) all the parts that are relevant to the design I am making before I start so it is easier to follow as the instructions for all the garments in your pattern are together on the sheet and some steps will be the same for multiple garments. By highlighting (in pencil) the ones you need you can easily ignore the ones you don't need this time.
Once you have read through the instructions you can go to cut out your pieces and start creating your garment. Make sure that the fabric is folded correctly and they you are cutting the right amount of pieces. Having read through the instructions it will have given you a better understanding of how all the pieces go together and you can start to construct your garment with more confidence.

Learning how to use a pattern is one of the best things I ever did, I am so grateful that my mum taught me from an early age. The thing I like most about making clothes is that you end up with clothes that are totally unique to you, with your choice of style and fabric.

I hope that was helpful to you if you are thinking of having a go at making something from a pattern, and that it has made it a little easier to follow. Is there anything else that you are interested in knowing about patterns? leave a comment and I will try and answer you query, If I think others might be interested I will write a post about it. Check out part 1 here and part 2 here, also check out our post about choosing fabrics from last year.

Sammy xxx

Don't forget to follow us on Bloglovin

Love it. Sammy's Art Wall

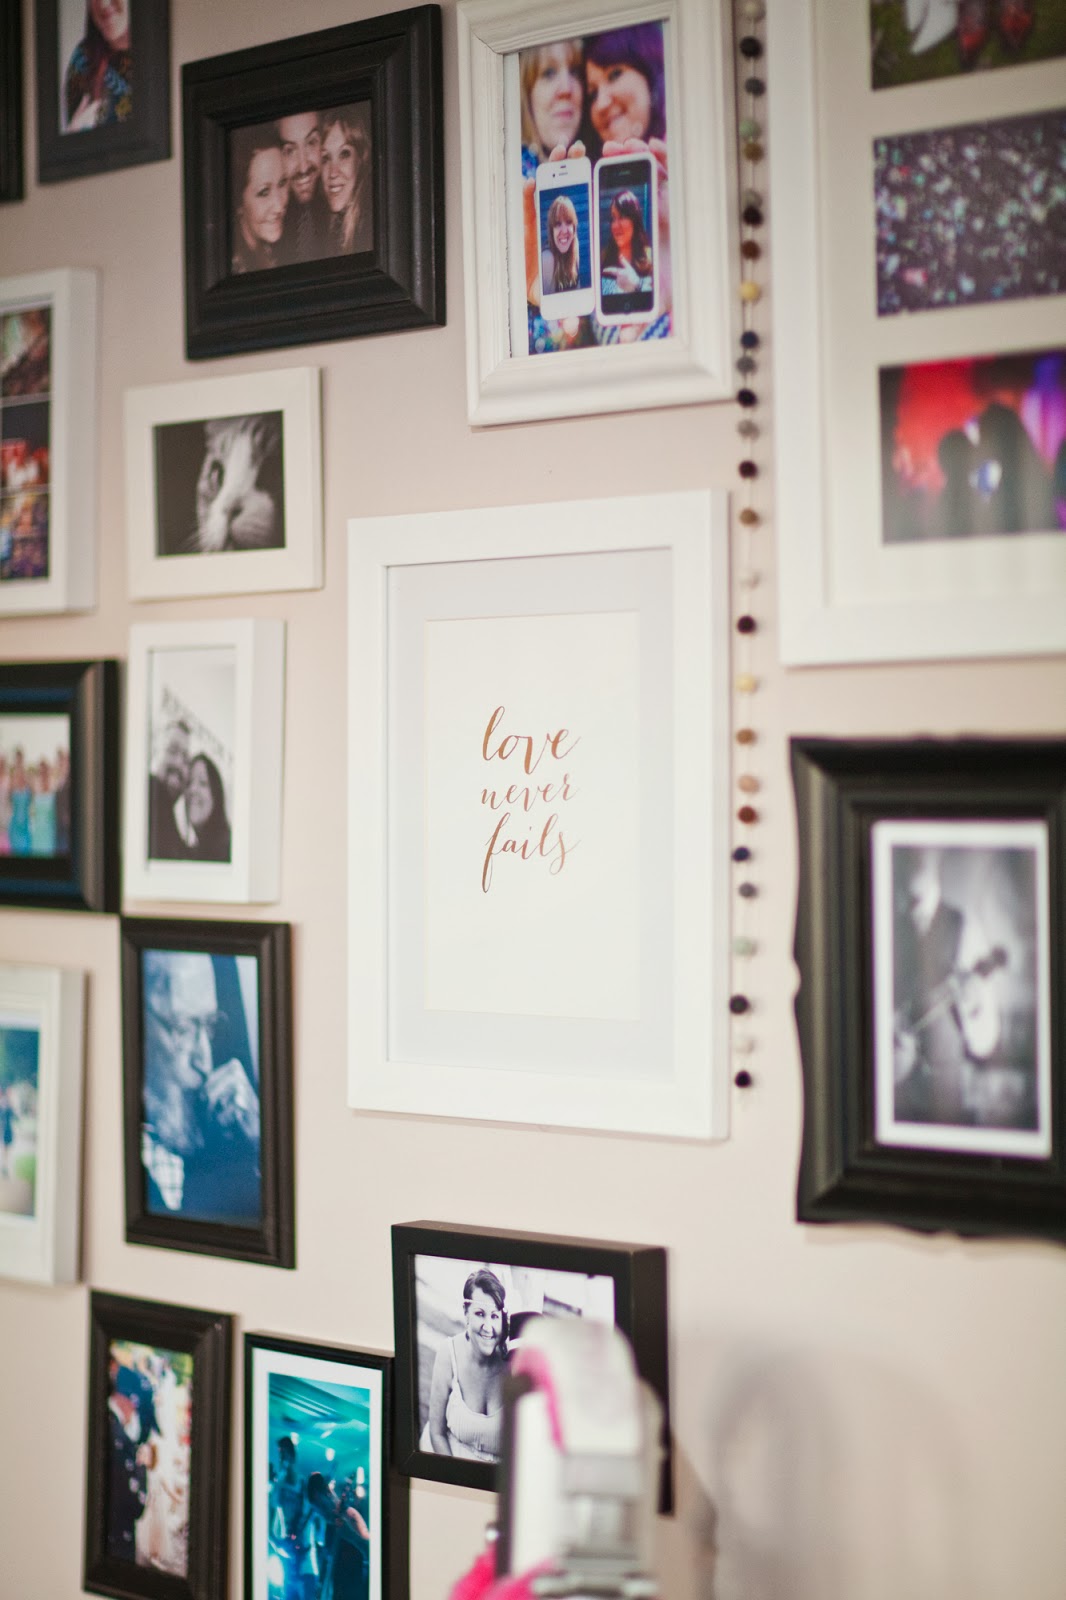
I am not the first and I wont be the last to install a art/photo wall in my home, just check out Pinterest, but I love it so much I just had to share. It may not be the straightest, or the most thought out, but having all these memories on my wall for me to be reminded of everyday is one of the best home improvements I have ever made. It makes me happy every time I look at, even if some of the frames are a little wonky and it features our old heating control that is welded to the wall, that's just how I roll. Also, yes I store my pink fluffy headphones on the surround sound speaker, Who doesn't?


Our wall is a mix of photographs and artwork. This gold print is by Jen of Stationary Boutique on Etsy.com and makes a gorgeous centre piece.

The top frame is made up of number photos that is the date of our wedding. I was so chuffed when I found a frame in the charity shop that it fitted in perfectly. It was pine originally so I just painted it black to fit in with the scheme I had. Nearly all of the frames are charity shop finds, re-painted to match.

I have a little felt ball garland surrounding some sketches I bought a few years ago from an artist I met on deviantart.com, Francesca aka Vampire Doll was selling off some of her originals, and I couldn't resist. I have been waiting to put these 'dark ladies' up for the longest time. In the middle of those is a piece I made with my Silhouette Cameo, a paper-cut of the word 'wonderful' inspired by a shop window display I saw in London.

The photos are a mix of family, friends and our cats. As well as a photo from every wedding that we have photographed, one of our own wedding of course, and a couple of gigs Steve and I have been photographers at too. There are a couple of special pictures of My Grandpa, one of me and him when I was little and one that I took of him a few years ago.

If you are thinking of putting up your own photo/art wall and have been putting it off, do it. I love ours and am so happy that we bit the bullet and just got on with it. I can't wait to add a couple more photos to our collection this year with two of our friends asking us to photograph their weddings, it is always such an honour to be asked to do that.

I hope this has inspired you to have a go at putting up some of your favourite art and photos. Have you got a photo wall already? I would love to see, tag it #livelovemake on twitter or Instagram so we can see yours too!

Sammy xxx

Food for the January Blues

Now, we all know that January can leave people feeling all kinds of glum, its the come-down from Christmas and the depressing weather no doubt.  This January has felt particularly bad with all the wet weather and floods the UK has been having, its been difficult to keep ourselves upbeat.  Every week, each Monday seems to have been given the Blue Monday tag, probably meaning people feel sad just thinking about it.

However, the best way to keep yourself chirpy, is with some serious comfort food, nothing better than a bit of stodgy food and cake to banish those blues!  And you know what, sometimes only some beans on toast or grilled cheese will do, but for those times when you just want a little something extra, we bring you some tasty recipes to try.  Your welcome!

How to make overnight oats
We all know that Breakfast is the most important meal of the day and so why not start with pushing those blues away at breakfast time!  These Overnight Oat recipes from A Beautiful Mess are on the wish list of things to make.  They will give you a great boost first thing to help you deal with your day and so its the perfect thing to try.


Next up is some tasty treats to help you get through the day.  These Toffee Ginger cupcakes look amazing and they are Gluten Free!  The girls over at Domestic Sluttery do some great Gluten free recipes and so there are no excuses to get that cake fix, sorry.


Picture
Or, if you are a biscuit fan rather than a cake fan, these Raspberry and White Chocolate cookies from the Turquoise Lemons blog are making us drool as we type!  We are partial to this particular pairing of ingredients and what's not to love about a cookie with a cup of tea?  After all, tea solves everything, right? 

Shepherds Pie with Slow Roasted Lamb
Over to some serious savoury dishes for dinner.  You can't beat a big dollop of Shepherds Pie to warm up your cockles on a dark and dreary day.  This recipe from Rosalilium just makes you want to dive right on in there.


Baked Mac & Cheese Recipe
For the veggies, or just don't fancy the meat tonight, there is always Mac and Cheese!  This used to be one of H's old housemates fail-safe dishes for making her feel better and we can see why.  Pasta, cheese and more cheese, yummy.  This one is from the Eating well website and so it is a little better for you than the usual.  Guilt free comfort food, even better.

Baked apple & toffee crumble
And, last but not least is your dessert to round off with.  This Toffee Apple Crumble is going to happen, alot!  It comes from the BBC Good Food website and does not disappoint.  H love's to make a crumble and has never had any complaints, but this little beauty looks like it will surpass her other versions.  The only last decision to make is whether it should be covered with cream or custard!

Well, that's the round up of some favourite recipes to banish those blues.  Do you have any recipes you like to use on those glum days?  Let us know in the comments below and we can have a go.

Remember that Food feeds the soul, and so it would be rude not to feed it right?!

H & Sammy

Live it: Domestic Sluttery Q&A at Made.com

Last week we hot-footed it up to London to go along to a Q&A with the lovely ladies of Domestic Sluttery.  The Ladies put on the event in order answer those questions, that they are always asked by us bloggers in training, all in one go.

Domestic Sluttery was set up about 5 years ago when home style blogs here in the UK were rare and blazed a trail. The site brings together lots of different writers who have a passion for all things domestic; cooking, homewares, travel, and just plain fun stuff - 'Cute or Creepy' anyone?

The event was held at the Made.com HQ and so we got to have a little nosey around there before the Q&A got started.

It was tough not buying up everything they had, but we resisted and H opted for a free pencil instead!

After the pre-event drinks we all sat down for the Q&A.  After a few short words from Sian - the founder and editor-in-chief, we were into questions.

It was great to be able to ask all those things that other people usually gloss over, especially in larger conferences.  There was about 60 of us there on the night and so we all had a chance to ask questions - after the initial 'no hands going up' of course!

They spoke honestly about advertising and inspiration in the first half of the night, with questions about optimising posts and links in your posts.  Also about how social media is a must for all us bloggers with questions about how to find which platforms work for you and how to use them to your advantage.

There was then an interval filled with cocktails and cake!  Amazing.

In the second half, it was talk about freelancing and how to do it - or in some cases how not to do it.  All the writers who work on Domestic Sluttery have freelance careers or full-time jobs and so for us, this was really interesting.

It was a great chance to find out more about what the ladies do and how they go about their normal lives around the blog - something which as full time workers and bloggers ourselves found really refreshing.

Seeing the individual personalities of all the girls was great too and they obviously get on just as much as you would imagine a bunch of girls to do, they just happen to write about beautiful and fun things too.

We had a lovely evening, that felt like hanging out with Domestic Sluttery.  We found some new and inspiring people to follow on Twitter and some good information to check out - so watch this space for how it might inspire us and our work here on our blog!

We also bumped into our friend Zoe from Craft Candy who let us into a few exciting developments with the site, can't wait to tell you all about that soon.

If you are a blogger or interested in freelance writing we would totally recommend keeping a look out for future events from these ladies. Head over to Domestic Sluttery and sign up for their newsletter, go on you know you want to.

H & Sammy