Showing posts with label tutorial. Show all posts
Simple No-sew Pen roll
Make it: Business Card Holder
Well hello there and welcome to another tutorial, just a small one today and it was inspired by last weeks National Stationery Week. Something I have been meaning to do for a long while was to sort out all the business cards I pick up at all the craft fairs we go to. I love to be able to go through the cards when looking for designers/makers to talk to for the blog and of course for present inspiration for my friends and family.
Make it: Disney inspired Mouse Ears
Our first tutorial of 2017 and its a nice simple one to get you back into the swing of things. It also is inspired by all the Disney adventures I saw over the last few months of 2016. Clearly Disney is still the place to go and so why not make your own ears, for your own adventures or even just to wear around the house!
Make it: Fabric House Advent Calendar on Skillshare
Make it: Pumpkin Fever
Oh Autumn, we love you so, but (spoiler alert) sometimes the inspiration doesn't strike us and we just want to hibernate rather than make all the fun Halloween themed goodies.
Makers Month: Make it: Embroidery Jewellery by Messy Brunette
We are in full Makers Month swing now and so we thought we would bring you a Guest Tutorial from the very lovely Maura from The Messy Brunette who we came across on one of our many Instagram trawls. We just love her crafty projects and she has a mean crochet hook to get through all those crochet projects. For us, Maura decided to share how to make your own Embroidery Jewellery, which is a lovely simple and easy to do in front of the TV or sat in the garden project. So over to her ...
Top 5 - Plantlife Make it's
Another top 5 for you today and this time we thought we would share the big trend of flowers and plants. It would be rude not to hey! For those who are not green fingered - like myself - there is an array of tutorials to try which give you the bright and colourful without the hayfever or worry that you will kill it at 5 paces - just me?
Make it: Avocado Jewellery dish
I am sure you have noticed I have a little obsession with Avocado's, as has most of the UK at the moment. Avocado on toast, avocado in salad, avocado mousse, you name it the Avocado is involved. So I thought I would make a DIY with the thing of the moment and make this Jewellery dish for all your little trinkets. Be warned though, if you are like me you will think that it is leftover avocado! I found myself nearly putting it away in the fridge a few times! Long week!
First up, you will need to make the dish itself and leave it to dry for a few days, so for this you will need: Air dry clay (I used Das), cling film, rolling pin, mould (I used the container that my avocado comes in, as it makes the perfect shape) and cutting tools.
Step 1: Cut out one of your moulds and then put cling film all over it.
Step 2: Cut off a chunk of clay from the packet. Make sure you wrap the packet back up with cling film and put it in a bag to keep it from going dry for the next time you want to use it.
Step 3: Roll out the clay to your desired thickness, I went for about 3/4mm as I wanted it to dry quicker and didn't want it to be too thick on the edges.
Step 4: Once it is rolled out, smooth over any cracks with a little water on your fingers. Do not dampen it too much or it will get sticky and unmanageable.
Step 5: Place your clay over the mould.
Step 6: Using the edge of your palm, smooth down the clay around the mould.
Step 7: Cut out the Avocado shape around the mould.
Step 8: Make sure your edges are loose from the table at this point if you didn't use cling film, otherwise it will stick.
Step 9: Smooth over the edges with wet fingers, so that there will not be sharp edges when you want to use your dish.
Step 10: Leave to dry for a good few days. The clay will dry out and may shrink a little.
Once you have your dish all dried out you will be able to paint it. For this you will need: Acrylic paints, brushes, water pot, paint palette and your dish.
Step 11: Firstly get some varying colours of the green and brown on your palette, I find it much easier when I have all the colours in front of me, to help mix them.
Step 12: I painted the back first, making it a dark green, giving it two coats.
Step 13: Then I painted the inside with a mixture of green, yellow and white, going over the colours a few times to blend all the colours together to give a more authentic look.
Step 14: Then with the darker colour from the bottom, I painted a line around the edge to act as the husk of the Avocado.
Step 15: I went over the colours on the inside again, blending the darker outside line and the area which would have the nut in it.
Step 16: Then I was ready to add the brown nut of the avocado, again this was a combination of a few brown colours to make a more authentic look.
Then you are finished! Your own little Avocado bowl to use for jewellery or whatever you like really, it could be a spoon rest in your kitchen too.
Hope you like this tutorial, make sure to #livelovemake on social media if you make this project or any of our other projects. Would love to see what you get up to.
H, xxx
Bloglovin / Twitter / Facebook / Pinterest / Google+ / Instagram
Makers Month: Make it: Shibori tie dyed curtains
Dyeing fabric is a bit of a new obsession for me and one which if
I’m not careful may consume my entire house! I had dyed fabric in school and
university but recently had another go with as it was the focus of one of my We
Make Collective boxes. If you want to know all about this and what I did with
my kit you can read about it here.
What you’ll need: White cotton curtains - or any cotton fabric, Dye - I used indigo dye from the kit but normal fabric dye will work
too, Rubber bands/string, Rubber gloves.
Step 1 - Dampen your fabric to encourage the fabric to absorb the
dye more readily
Step 2 - Mix up your dye as instructed on the packet. I used indigo dye which can be a little trickier to get ready but once you’ve mixed all the ingredients it should have a film on top like this...
Step 3 - Tie up your fabric with your rubber bands or string. You
can follow traditional patterns such as pleating or marbling or just make it up
as you go along! The basic rule is that wherever you tie on a rubber band it
should prevent the dye from reaching the fabric and create a pattern. I chose
to pleat my curtains so began by folding them both with the same sized pleat by
laying them next to each other as I folded.
This was by no means an exact science but again all adds to the
charm of the overall effect. Once I had pleated both curtains I attached my
rubber bands along the fabric. Mine are blue as I had used them previously.
I wanted to try and get them fairly evenly spaced on both curtains
to create a similar effect when dyed.
The most important thing is to make sure that you tie the rubber
bands or string on tightly as if you leave any room for the dye to get in you
wont see any pattern when you take them off.
Step 4 - Dye your fabric! You want to immerse the fabric in your dye
carefully to avoid spillages and wearing gloves can help to prevent funny
coloured fingers! It will probably float on the top so make sure you keep
turning it every now and then to achieve an even dye. Again follow your dye
instructions for this. If using indigo dye you only need to leave your fabric
in the dye for a few minutes and then take it out where it will slowly turn
from green to blue as it oxidises.
Step 5 - Hang to dry & then display!I have also used this technique as part of my year long creative project #daphnerosainbloom where I am using a different flower in bloom each month to inspire me to create something and blogging about it here. April's tulips definitely benefited from my new obsession!
I hope you enjoyed the DIY and have lots of fun exploring the world
of dyeing! I’d love to see any of your efforts so do be sure to tag me on
Instagram if you share. You can find me at @daphnerosaflowers.
Kate, x
Thanks so much to Kate for this fabulous tutorial, don't forget to #livelovemake on Instagram or twitter if you give this a go and tag @daphneroasaflowers too of course!
Now, what can we use for all the Shibori dying we are going to be doing! ha ha
H & Sammy, xxx
Bloglovin / Twitter / Facebook / Pinterest / Google+ / Instagram
Make it: Make-up Brush Pot
I am one of those people that needs a place for everything and so mugs, jugs and pots get used for everything in my house. I like to keep everything in some kind of order and so when thinking of a project for the blog, I thought about making a pot out of air dry clay for my make-up brushes. It could also house pens or a plant, whatever you want to really. So, here is how I made it.
You will need: Air dry clay (I used Das, but there are loads on the market) Cutting/modelling tools (mine were from Tiger), cling film, newspaper, a mat/surface you don't mind getting dirty, rolling pin, straight edge (you could use a ruler but I decided to use some off cuts of wood to get the right length/width), a pot for water, Acrylic Paints and paint brushes (not shown, sorry).
If you haven't used air dry clay before, there are a few things to note; It does dry out and so if you have any left over make sure you wrap it up well to keep it fresh, make sure your hands don't dry out too much when using it (you can have a damp towel next to you to help), but don't make it too wet or it will become slippery and unmanageable, it should dry in a few days (you may have to turn it over to make sure it dries on all edges).
Step 1: Cut off the amount you think you may need, you can always cut off more though.
Step 2: Start rolling out your clay, make sure to try and roll it to the same thickness all over and think about the shape you want to make. I wanted to make a long rectangle and so I rolled out to make that shape.
Step 3: Using your straight edge, cut off any excess. You can use this clay and roll it out again perhaps once more, but after that it tends to get a bit dry and cracks easily.
Step 4: Using some water to moisten your fingers, smooth off the rough edges on all sides.
Step 5: If you want to give your pot a texture, you can use lace/textiles or objects to roll a pattern into the clay. Try not to push down too hard with the rolling pin, but the pattern should come through onto the clay.
Step 6: Using another pot or glass, cut out a circle of clay from any leftovers from the side or fresh clay.
Step 7: To add the clay together you will need to cross hatch into the clay with one of your tools, to make a rough edge on both sides of the edges you want to join. Also add a bit of water here to give it some extra stick. You may need to smooth out the clay together also, to ensure that both pieces of clay join.
Step 8: I wanted to make a fold over flap design on my pot and so cut out another piece of flattened clay that was thinner to fold around the pot joining the circle. Add the clay pieces as in Step 7, making sure it feels secure.
Step 9: You may need to smooth off the edges again with a moistened finger to give a nicer finish.
Step 10: The clay may take a few days to dry, depending on the weather. Leave it in a well ventilated room and let it dry naturally, so a bit of patience here I am afraid. Add some newspaper wrapped in cling film if you like so that the pot stays in shape as it dries. The colour starts to get brighter when it is dry and so then you could always turn it upside down to dry the bottom of the pot aswell.
Now you have a lovely dry pot, you can paint it! yey. I decided that I wanted to use the same colours as my room and I just love this Fluorescent Yellow and Phthalo Turquoise I had in my stash.
I decided to go a little different (as I always go for blue first on everything) and paint the blue on the inside, I did add a little white to the turquoise to make it a bit lighter. I made sure I kept the paint quite thick so that it gave a nice bright bold finish. Acrylic paint also gives a nice sheen to air dry clay, but you may also want to consider a varnish or using a PVA wash if you would prefer a shine to the surface.
I then painted the yellow on the outside, adding it to the top lip and bottom. I made sure the top lip was dry first and then tipped it over to paint the bottom.
Then another wait for it to dry and voila, it was finished! I could put my make-up brushes and a few other bits in it on my shelf! I think it looks great in my room and is just an excuse to add more pots to my room really! ha, ha.
The great thing about this is that you could scale it up or outwards depending on what you wanted to use it for. I have tried to make sure all my edges are sealed, but I think if I was using this as a plant pot I might add the plant in a little plastic pot or something, just to make sure. But for me, it works just as I like it.
Don't forget that if you try out any of our tutorials please add a picture and #livelovemake on twitter or instagram as we would love to see them.
H,xxx
Bloglovin / Twitter / Facebook / Pinterest / Google+ / Instagram
Guest Tutorial: The Make Arcade - Felt Succulents
Hi! Ruth here from The Make Arcade. Sammy and H invited me to put together a tutorial for their
lovely blog readers - so here goes, great to be here!
You can’t have not noticed the succulent trend that's happening at the moment - I love a succulent
as they are so cute but as someone who hasn’t a great track record at being green fingered I have
used succulents as my inspiration for a felt based craft project and created a felt succulent display!
They are a perfect subject for felt work as all subtly different - full of texture, inspiring colour
palettes and quirky character.
For this project you will need:
A selection of felt- for mine and got a muted colour palette (but
would work equally as well in brights or greys!)
Glue gun (I glued this project but you could sew it too!)
Scissors
Thin card
Display item - my wire basket is from Tiger - but you could use vintage kitchenware, enamelware
or wooden crate perhaps?
We will be making 4 different types of succulent design - you can make as many or as few as your
display item allows, they are quite addictive to make.
cut it to the shape your your display unit (I drew round the wire basket). This is the basis for your
display. Place your succulents on the card, play around with the layout and take a picture for
reference before you start to stick! Stick all the pieces down, lift leaves to make it really 3D. I added
a few felt balls that I had in my stash too.
succulent piece. I then placed this into my wire basket and secured it with a few blobs of glue. Voila
- one gorgeous succulent display!
H & Sammy, xxx
Bloglovin / Twitter / Facebook / Pinterest / Google+ / Instagram
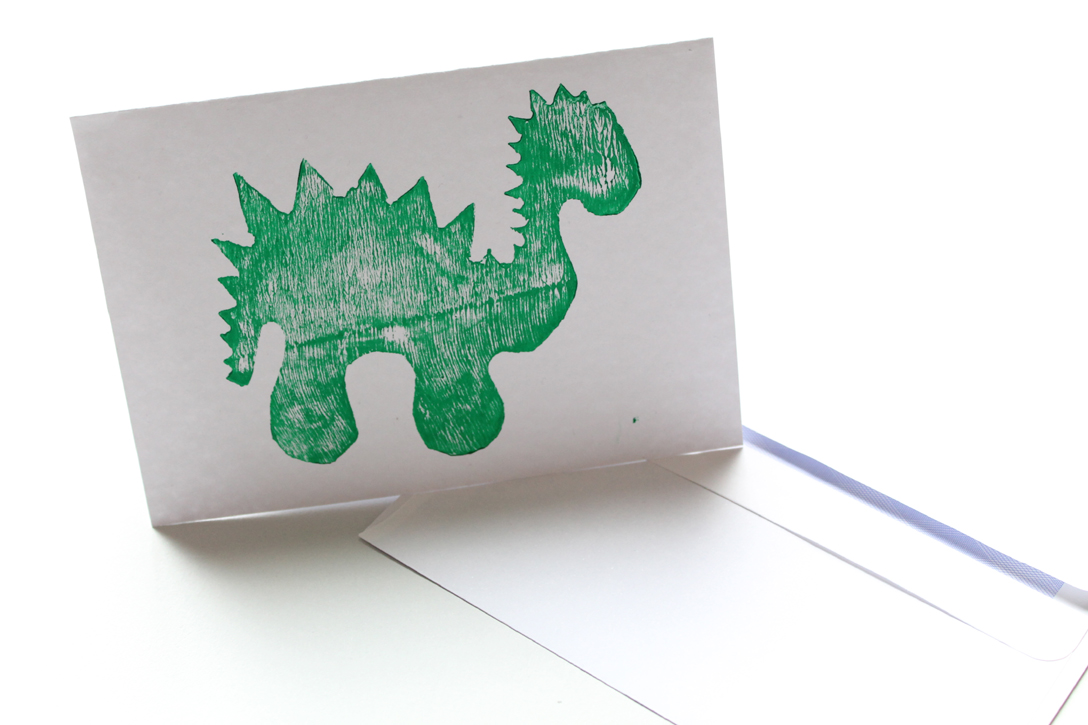
Make it: Dinosaur birthday card linocut print
Hey all, after my Geometric Print tutorial way back in January, I thought it was about time to step up the printing game and show you another technique of Linocuts. This also shows one of the printing techniques in one of the craft books you can win over on the blog this week, see the post here for more details (competition only open until the 18th March 2016).
I have always been a fan of the easy carve lino, it makes life so much simpler and is easier to handle and gives you less cuts on your hand - always a good thing! On that, one thing to note is that the tools are sharp, so watch your hands, always carve away from you or your hand and keep plenty of plasters around - just in case. Just like papercutting, this can be a dangerous game! So lets get started.
You will need: Lino of some sort (I found this easy carve lino in Tiger), Card or whatever you want to print onto, ink roller, Safety hand guard, tea towel or something to protect your surface, paintbrush, pencil, lino cutter with different blades, rubber, acrylic paint. You may also need a tray to put your paint in - not pictured. You can buy a starter kit from places like Cass Art.
You could also use a hand safety guard if you prefer so that you can push against it for leverage and keep your fingers intact! The idea with lino is to cut away any parts that you do not want. This lino from Tiger is great as it has a different colour in the middle of it and so you can see when you have taken away enough. It is also very thick, which helps as I like to cut down to about half the thickness of the lino so that I can make sure that the right areas will not come out when printing.
Step 3: When you have finished carving you will have a lovely pile of lino to get rid of and be able to see your design in more detail. You can then go around and make sure there are no parts that will go above your design, so that it will add to your chosen design when the paint is added.
Step 4: Add some of your acrylic paint to an old tray or glass chopping board and using the ink roller roll it out to cover your roller and make sure all the paint is spread evenly. I find acrylic paint is better to use as it is stickier and so keeps to the roller and lino better.
Step 5: Then you can proceed to cover your lino with the paint. At this point if there are any areas that are too high, then you will be able to see them and so can cut them away before printing.
Step 6: Get your card or whatever you want to print onto and put it onto a surface where paint doesn't matter if it gets onto it. I always use an old tea towel, so that it gives a good soft surface to press onto too.
Step 7: Then position your lino on top of the card, making sure you don't move it, just press down. Some people like to use a clean ink roller and go over the top to make sure it is fully pressed. Then start to peel away the lino, again making sure you don't move it, or it will smudge.
You will then have your finished card! This one is perfect for someone who really loves dinosaurs!
These are some of my other linocuts, I have so many more, but I thought a sample would do. You can cut them so that it is only the outline you see, like the elephant. Or you could cut around the lino to make an outline without having to carve the whole of the outside like the giraffe shape. You can add a small cut to a block so that it is easier to handle for printing, like the leaf one here.
I hope you enjoyed learning how to do more printing, I think I will do a few more of these tutorials to show different ways of printing, as I find it quite therapeutic.
What would you like to learn to print? Any who would you make it for, let us know in the comments below. Also if you do have a go at any of our tutorials please do #livelovemake on twitter or instagram and so we can take a look.
H,xxx
Bloglovin / Twitter / Facebook / Pinterest / Google+ / Instagram
I have always been a fan of the easy carve lino, it makes life so much simpler and is easier to handle and gives you less cuts on your hand - always a good thing! On that, one thing to note is that the tools are sharp, so watch your hands, always carve away from you or your hand and keep plenty of plasters around - just in case. Just like papercutting, this can be a dangerous game! So lets get started.
You will need: Lino of some sort (I found this easy carve lino in Tiger), Card or whatever you want to print onto, ink roller, Safety hand guard, tea towel or something to protect your surface, paintbrush, pencil, lino cutter with different blades, rubber, acrylic paint. You may also need a tray to put your paint in - not pictured. You can buy a starter kit from places like Cass Art.
Step 1: Start by drawing your design onto your lino, I chose to draw this cute dinosaur. The pack from Tiger comes with some handy pieces of tracing paper to use so that you can get your design right before going onto lino. But otherwise just draw straight onto it. Pencil is better to use as then any ink will not bleed when you use any ink or paint later. Remember as always with printing, anything you draw will be mirror imaged when you print. So if you want something to be a particular way around, draw it the opposite way.
Step 2: Then you can start to carve. Always carve away from you and I like to try and get as much carving done in the same direction. But sometimes it is easier to follow the outline first and then carve away from it. It is up to preference of how you find it works better for you. I would start with a simpler picture first, curves actually work out easier to do rather than sharp points and straight lines.
Step 3: When you have finished carving you will have a lovely pile of lino to get rid of and be able to see your design in more detail. You can then go around and make sure there are no parts that will go above your design, so that it will add to your chosen design when the paint is added.
Step 4: Add some of your acrylic paint to an old tray or glass chopping board and using the ink roller roll it out to cover your roller and make sure all the paint is spread evenly. I find acrylic paint is better to use as it is stickier and so keeps to the roller and lino better.
Step 5: Then you can proceed to cover your lino with the paint. At this point if there are any areas that are too high, then you will be able to see them and so can cut them away before printing.
Step 6: Get your card or whatever you want to print onto and put it onto a surface where paint doesn't matter if it gets onto it. I always use an old tea towel, so that it gives a good soft surface to press onto too.
Step 7: Then position your lino on top of the card, making sure you don't move it, just press down. Some people like to use a clean ink roller and go over the top to make sure it is fully pressed. Then start to peel away the lino, again making sure you don't move it, or it will smudge.
You will then have your finished card! This one is perfect for someone who really loves dinosaurs!
These are some of my other linocuts, I have so many more, but I thought a sample would do. You can cut them so that it is only the outline you see, like the elephant. Or you could cut around the lino to make an outline without having to carve the whole of the outside like the giraffe shape. You can add a small cut to a block so that it is easier to handle for printing, like the leaf one here.
I hope you enjoyed learning how to do more printing, I think I will do a few more of these tutorials to show different ways of printing, as I find it quite therapeutic.
What would you like to learn to print? Any who would you make it for, let us know in the comments below. Also if you do have a go at any of our tutorials please do #livelovemake on twitter or instagram and so we can take a look.
H,xxx
Bloglovin / Twitter / Facebook / Pinterest / Google+ / Instagram
Subscribe to:
Posts (Atom)


