Hey all, after my
Geometric Print tutorial way back in January, I thought it was about time to step up the printing game and show you another technique of Linocuts. This also shows one of the printing techniques in one of the craft books you can win over on the blog this week,
see the post here for more details (competition only open until the 18th March 2016).
I have always been a fan of the easy carve lino, it makes life so much simpler and is easier to handle and gives you less cuts on your hand - always a good thing! On that, one thing to note is that the tools are sharp, so watch your hands, always carve away from you or your hand and keep plenty of plasters around - just in case. Just like papercutting, this can be a dangerous game! So lets get started.
You will need: Lino of some sort (I found this easy carve lino in
Tiger), Card or whatever you want to print onto, ink roller, Safety hand guard, tea towel or something to protect your surface, paintbrush, pencil, lino cutter with different blades, rubber, acrylic paint. You may also need a tray to put your paint in - not pictured. You can buy a starter kit from places like
Cass Art.
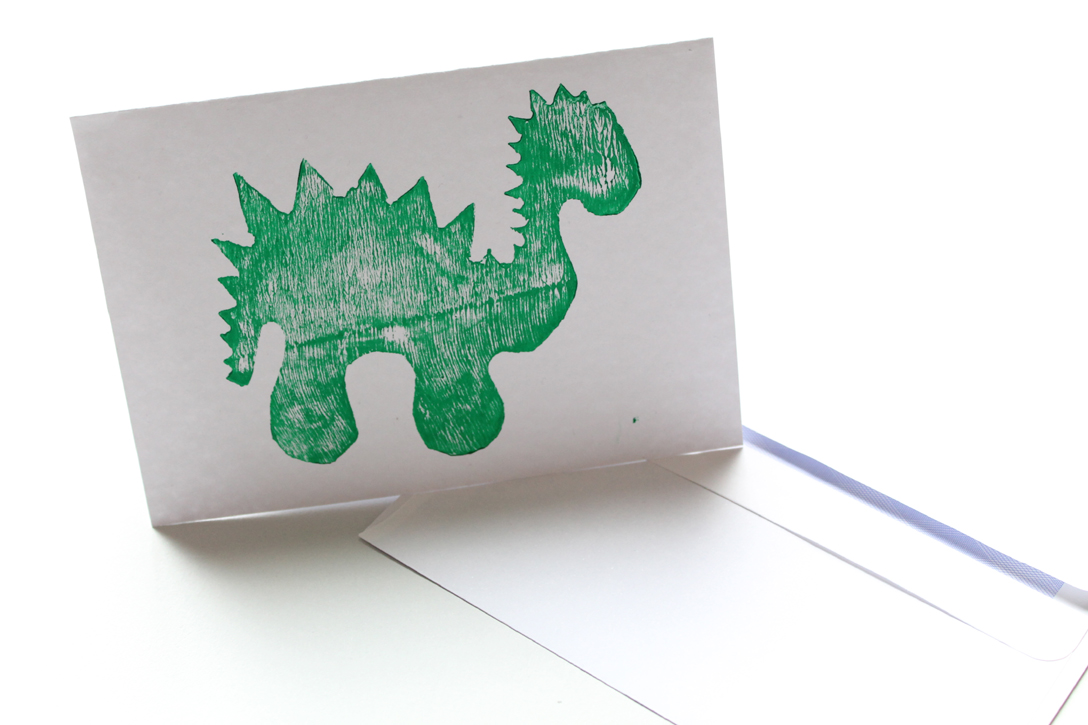
Step 1: Start by drawing your design onto your lino, I chose to draw this cute dinosaur. The pack from Tiger comes with some handy pieces of tracing paper to use so that you can get your design right before going onto lino. But otherwise just draw straight onto it. Pencil is better to use as then any ink will not bleed when you use any ink or paint later. Remember as always with printing, anything you draw will be mirror imaged when you print. So if you want something to be a particular way around, draw it the opposite way.
Step 2: Then you can start to carve. Always carve away from you and I like to try and get as much carving done in the same direction. But sometimes it is easier to follow the outline first and then carve away from it. It is up to preference of how you find it works better for you. I would start with a simpler picture first, curves actually work out easier to do rather than sharp points and straight lines.
You could also use a hand safety guard if you prefer so that you can push against it for leverage and keep your fingers intact! The idea with lino is to cut away any parts that you do not want. This lino from Tiger is great as it has a different colour in the middle of it and so you can see when you have taken away enough. It is also very thick, which helps as I like to cut down to about half the thickness of the lino so that I can make sure that the right areas will not come out when printing.
Step 3: When you have finished carving you will have a lovely pile of lino to get rid of and be able to see your design in more detail. You can then go around and make sure there are no parts that will go above your design, so that it will add to your chosen design when the paint is added.
Step 4: Add some of your acrylic paint to an old tray or glass chopping board and using the ink roller roll it out to cover your roller and make sure all the paint is spread evenly. I find acrylic paint is better to use as it is stickier and so keeps to the roller and lino better.
Step 5: Then you can proceed to cover your lino with the paint. At this point if there are any areas that are too high, then you will be able to see them and so can cut them away before printing.
Step 6: Get your card or whatever you want to print onto and put it onto a surface where paint doesn't matter if it gets onto it. I always use an old tea towel, so that it gives a good soft surface to press onto too.
Step 7: Then position your lino on top of the card, making sure you don't move it, just press down. Some people like to use a clean ink roller and go over the top to make sure it is fully pressed. Then start to peel away the lino, again making sure you don't move it, or it will smudge.
You will then have your finished card! This one is perfect for someone who really loves dinosaurs!
These are some of my other linocuts, I have so many more, but I thought a sample would do. You can cut them so that it is only the outline you see, like the elephant. Or you could cut around the lino to make an outline without having to carve the whole of the outside like the giraffe shape. You can add a small cut to a block so that it is easier to handle for printing, like the leaf one here.
I hope you enjoyed learning how to do more printing, I think I will do a few more of these tutorials to show different ways of printing, as I find it quite therapeutic.
What would you like to learn to print? Any who would you make it for, let us know in the comments below. Also if you do have a go at any of our tutorials please do #livelovemake on twitter or instagram and so we can take a look.
H,xxx

Bloglovin / Twitter / Facebook / Pinterest / Google+ / Instagram