Makers Month: Super + Super Retro Lampshade Tutorial


Its our final day of Makers Month and what a treat we have for you today.  We  spoke to the very lovely Amy at Super + Super who are based in Brighton and now Nottingham, who gave us one of their lovely tutorials from their Printmaking book.  Go check out their other books too, they have Embroidery, Papercutting and Crochet too.

So over to Super + Super.  This is one for the textile lovers and is a slightly more technical project. Try to source some second-hand or vintage fabric to give this 1950s-inspired print a little extra authenticity.

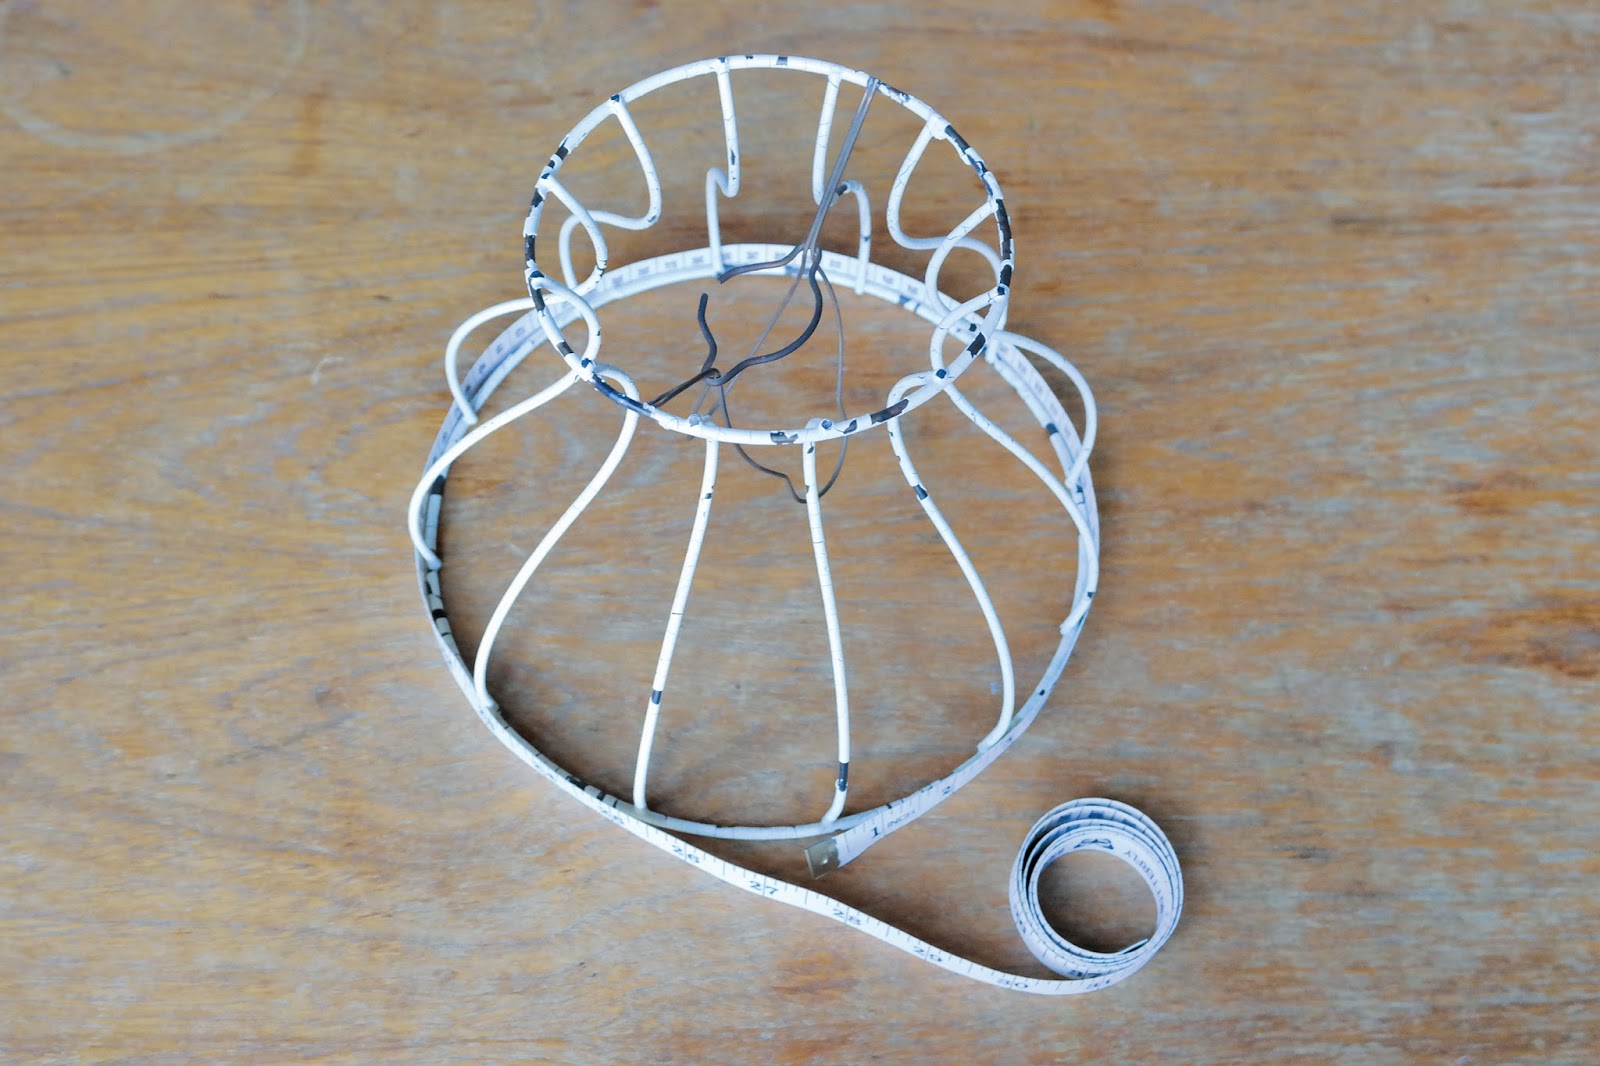
What you need:  Old birdcage-style lampshade frame, Up to 39in (1m) of plain white fabric, Scissors, Pinking shears, Pins, Fabric ink or paint, Sponge roller, Small wooden block, Cotton string, Embroidery needle and sharp, Thread, 39in (1m) ribbon, Tape measure.


1. Remove any remains of old fabric covering your lampshade frame. Measure the top and bottom diameters of the lampshade. The biggest measurement will be the length to cut the fabric to.


2.  Now measure the height of the lampshade. Once you have these two measurements, you need to add 5⁄8in (1.5cm) at each end for the seam allowance.


3.  To make the stamp take a 20in (0.5m) long piece of string and wrap it around the width of your wooden block and tie in a double knot at the back. Then wind the string around the block about eight times. Move the string around a little until you are happy with the spacing.


4.  Pour some ink onto an old plate and load up your sponge roller.

Tip! Sponge rollers are cheap and are the best way to spread your ink evenly, especially on bumpy surfaces such as this string creation.


5.  Working from left to right or vice versa, print in straight lines across the length of your fabric. Turn the block 90° to the left and right between each print to alternate between horizontal stripes and vertical stripes.


6.  Once you have covered the entire surface, hang the fabric up to dry. You can speed up the drying process with a hairdryer.


7.  Pin 5⁄8in (1.5cm) hems along the longest sides of the fabric, which will be the top and bottom of your lampshade. Later these will be used to thread a drawstring through to fit the fabric to the frame.


8.  Sew along the length using straight stitches in a colour of thread that matches the fabric. You could use a machine for this if you have one. Secure at each end by sewing a few stitches backward and forward at the start and finish.


9. Now, with the right sides together, pin the two short ends together and sew 5⁄8in (1.5cm) in from top to bottom. Secure in the same way as you did in step 8.


10.  Now press the fabric to fix the ink and remove any creases, then turn your tube the right side facing out. Check it fits over the largest part of the frame, then remove again. Using your embroidery needle, thread long lengths of string through the top and bottom hems, gathering as you go.


11.  Place the fabric over the frame and pull the strings to gather around the top and the bottom edges of the frame, securing with a bow.


12.  Take your ribbon and tie it around the neck of the shade to pull the fabric into shape. Finally, readjust the string at each opening before knotting securely and trimming any excess length off.


As you may know H is a massive fan of printing and so this is such a great tutorial to try printing out on your kitchen table with simple materials.  You could also print tea towels or t-shirts in this simple way.  What would you print?

Thanks to Amy and Super + Super for the great tutorial, you can take a look on their website or facebook page for more and follow them on Instagram @supersuperhq.

And Thank you for reading all our Makers Month Posts, we have had great fun once again with our themed month of Maker joy.  We hope you enjoyed them too, which was your favourite?  Let us know in the comments below.

See you Friday!
H & Sammy

Bloglovin / Twitter / Facebook / Pinterest / Google+ / Instagram

Makers Month: Claireabellemakes top 10 tips for selling at craft markets


Craft fairs and markets are our favourite way to connect and shop with designer/makers. We get to have a chat with the super talented folk that create the handmade things we love. But lets face it they can be daunting for sellers who spend a lot of time creating alone. We asked our lovely friend Claire, designer and blogger at Claireabellemakes, to share her top ten tips for getting organised and selling at craft markets to make the whole thing a little easier to navigate.

1. Feedback – If the market is one that is new to you, make a point of contacting vendors that 
have sold there before to ask how they found it. The best markets I have done have been those that were recommended to me by others. Ask the organiser about footfall and what kind of marketing they will be doing to promote the event.


2. Do a mock set up – Each fair will have a different sized booth or table, so be sure to measure out the space provided to see how much stock you might be able to display. I like to tape out the table size in my studio then work out how I can arrange stock accordingly. Take a photo. Then, when you arrive at the fair, you will have a reference picture and it will be quick to set up!


3. Ask for help – Personally I find fairs to be one of the most exhausting aspects of my business and they can often be unpredictable. I did one market which was in a gazebo outside during December. I had anticipated it would be cold, but I didn't realise how cold I would get after 8 hours of standing behind a stall. Ask friends to bring you hot drinks and extra socks when needed! As I also have health issues, I often ask a friend to help with my stalls, especially if they require travel to the venue. Having someone there who can relieve you for a rest period or loo break is invaluable. You could offer to pay them a small fee or even make them something custom as a thank you. I will always pay my helper’s travel and give them lunch and then we decide between us how they would like to be repaid for their time.


4. Take a ‘useful box’ – I like to bring along a box of useful items that I could need for any fair. This box includes pins, string, tape, scissors, chalk, notepad, pens, pegs. It is invaluable to have these items on hand and although you may not need them for every market, you will make friends with people who are in desperate need of string or tape as they wont forget you! I also make sure to bring a stamp with my web address on in case any business cards run out. Sometimes you can never tell how busy a market will be!


5. Take water and snacks – Some markets can be long and with travel, set up and set down, you may work long periods without a proper break. Be prepared and take plenty of water with you, as well as snacks. You will be so pleased to find an apple in your bag once you hit the train home and your fair fatigue is setting in. 


6. Keep cash safe – I used to take a cash tin to markets, but felt very uneasy about leaving it when visiting the ladies even though it had a little key. In comes the Bum Bag, or as the Americans call it, the Fanny Pack. I had one in the 80s and it rocked my world, so I made sure the one I use for markets is just as amazing. Cue this amazing glitter bum bag from Beksies Boutique. It helps to keep all cash on me as I then know where it is at all times.


7. Accept cards – As well as taking cash, I always make sure to accept card payments at any markets. Customers are likely to spend more if there is an option to use a card. Portable card machines such as this one from Payleven, are really easy to use and connect to smart phones via Bluetooth. There are even options to send receipts to customers and having a machine will provide your business with credibility. 


8. Offer deals -  I want my market customers to feel as though it is worth visiting my stall, so will often offer exclusive deals for that day. For example, 3 cards for £6 instead of £2.50 each. Share these offers on social media prior to the event and it may make people want to visit you just for the deals!


9. Inventory – Prior to each market, make a list of all stock you wish to take along and print this out for your records. Each time an item is sold, tick it off on the corresponding inventory list. At the end of the day, you can check stock against items sold and ensure that each sale is accounted for. It takes a bit of preparation, but saves tons of time when cashing up at the end of the day and even when you are filing your accounts.


10. Network – Each market opportunity is a fantastic way to network across the community. Get to know your stall neighbours and follow them on social media after the event. Keeping in touch with other vendors could lead to collaborations and opportunities.


Thanks for having me today guys! I've really enjoyed sharing my tips on preparing for craft markets and I hope your readers will find them useful. Why not take a look at my visit to one of my favourite markets ever, Renegade in London or a video of my time as a vendor at BUST Craftacular.

Thanks for sharing your tips Claire.

Sammy, H and Claire xxx

Bloglovin / Twitter / Facebook / Pinterest / Google+ / Instagram


Makers Month: Designer/Maker Favourites

Monthly favourites time again and this time I am sharing some goodies from my designer/maker treasures that I love the most.

Makers Month: The Refashioners 2015


It's not often I remember how or when I found a blog, but in the case of Portia Lawrie's blog Makery.uk I remember specifically. It was September 2013 and was at work searching for good examples of customising to use for a window display for Sew Crafty. I came across Portia's pashmina/t-shirt re-fashion and I knew then that it would be a blog I was going to have to keep an eye on!  

This year saw her take a monthly column in Simply Sewing magazine, build her very own sewing shed and launch the third season of The Refashioners. The series designed to bring the sewing community together in an online group project like no other. We had a little chat with the lovely Portia and she filled us in on everything you need to know about it. 


Hey Portia, for those who are new to it, tell us a little about the story behind the re-fashioners? 
The first series launched in 2011 with 6 participants in total and running over a week only. Participants were sent a variety of secret garments by me; with the challenge to turn them from "Meh" to amazing and share the results and the "how to" in the hope that it would inspire others to get refashioning...I wanted to raise the profile of refashioning. Shout about it's ecologicial and economical credentials and show just how creative it can be and encourage people to look at the "fabric" they have at their fingertips. It's all just fabric after all! Fast forward to 2013 and the second series. This time doubled in size and running over a fortnight as opposed to a week with eleven participants. Again, I sourced all garments and the participants had NO idea on what they were getting. (Evil laugh!)
The aim this year is to make this series bigger and more far reaching than ever before. To get as much of the sewing community refashioning in August/Sept and beyond, as we can. So far it looks like we're achieving that! With 20 awesome blogger inspiration posts that ran throughout the whole of August; now the community challenge is gathering pace too. Looks like large swathes of the sewing community have taken up the call to "get shirty" with us! 


How was it approaching all the amazing people who were involved this year?
I'm always nervous when I approach the bloggers and stitchers on my wishlist for the series. They're usually on there because I admire them for some reason. When you admire someone and you ask them to join you in something, you really really really want them to say yes. But of course they have the option to say no too!! Which means a potentially gutted Portia, lol! Thankfully the majority of those that I approached said a resounding yes; and BOY did they not disappoint this year! I always feel incredibly privileged to host such talent in my little home on the web. Still pinching myself!


It must have been fun watching the blogger entries roll in? Was it intimidating to then have to post your own re-fashion? 

Ha ha! You are NOT kidding! It's kinda fitting for me, as the "instigator" to close off the series I think.  But as the series unfolds (I would squeal with delight every time I saw the next blog post roll in to my inbox!) and the standard of pure genius becomes apparent...well!  I mean, really, when you're the one that threw down the challenge in the first place; you have to come up to scratch yourself, right!! What was really interesting though, was how many of my fellow participants also confessed to feeling nervous themselves. The blogger part of the series is in no way a competition. Each participant has their own style; their own way of working; their own uniqueness. That's the point. But when you see who you're playing alongside, there's an understandable temptation to "up your game". I think most of us felt that to be honest. But from a place of "not wanting to let the side down" rather than trying to better anyone else. I was no exception to that feeling of course. I'm not "the best" at refashioning just because I came up with The Refashioners. I just refashion in a way that suits my taste and my ability. I just made sure my refashion was done and in the bag before I saw what everyone else was doing, lol! If I'd have seen what everyone else was doing first I may have been influenced, intimidated or otherwise distracted. And I'm really pleased with my little kimono idea! I think it holds it's own ;)


Where did the idea for opening out to the public come from?

Ah, the question should really be "Portia, why on earth didn't you open this up to the whole community before now you muppet?!"

Really it's something I should have done before I guess. But  I was still streamlining the whole concept and initially I didn't know if people would even respond to the idea or be interested in taking part. Back then refashioning was very much the poorer cousin of conventional dressmaking. After the second series the response from my readers was amazing and there seemed to be an increased appetite for refashioning. When I announced this years series, right off the bat I had people asking if they could join in and how they could take part too. Well, what could I do except put together a massive prize package and say....go on then...show us what you can do! Have you seen some of the entries coming in on IG and Pinterest??! Wow!


Are there any of the re-fashions that you are thinking of re-creating for yourself? 
Gosh, they're all so awesome! But if you're asking in terms of what might actually suit me, anyone that knows me knows I'm a flan of simple lines and simple construction. So a version of Ute's simple white shirt, that kicked off the series, is in my future for sure.  I like Wendy's interchangeable denim dresses and might apply the collar swapping concept to some silk shirts and colour block them. Erin's wrap top has me wondering if it's a style I can carry off. So that may appear at some point in a slightly different interpretation.  I will also be making another shirt kimono! I genuinely like the concept. The one I made is the first incarnation of the idea and I'd like to try it again with a few minor mods. So I'm on the hunt for shirts again, ha ha!


What has it been like working with Simply Sewing Magazine? Do you think working with such a new magazine has helped raise the profile of re-fashioning? ( do you have a photo of one of the things you have done for Simply Sewing?)
I've been so lucky with Simply Sewing.  They are very easy to work with and I've really enjoyed being part of the magazine right from issue one. I was so chuffed when they first contacted me to be a part of it! Even in this increasingly digital and virtual world, print adds a specific credibility to a venture. So I'm incredibly grateful to the team at Simply Sewing for throwing their support behind The Refashioners series. I think the profile of refashioning has been growing slowly over the last few years and I sense it's gathering momentum now. Long may that continue! 


Do you have favourite refashion from your archive? ( ie one that you have made) can you include a photo? 
My favourite is usually my most recent. But aside from that the refashion above  that I did for Simply Sewing (image below) is one of my faves. In terms of the one I wear the most, it's my banded tee (image above). It's just so comfy; I reach for it as soon as it's out of the laundry again. I'm a total comfort dresser!


Who is your favourite Instagrammer? 
There's too many!!! IG has become my preferred hangout in terms of social media. I don't know why it took me so long to discover it. Blog posts take time and planning to put together and the subject matter kinda needs to warrant a blog post in the first place! IG is great for sharing snippets of ideas, thoughts etc  and seeing what everyone else is up to as well! I've found myself having conversations with people from all over the world, in real time (sometimes silly o'clock my time!) So cool! It's like a micro blog, twitter and  pinterest all rolled into one. Awesome!


Thanks Portia! 

We have been so excited to see the growth of this series and we have loved discovering lots of new sewers to follow too. Customising and 'refashioning' is a big love of both H and myself. We are looking forward to seeing all the entries for the public competition #therefashioners2015 . Totally do Not envy the job of deciding that one! 

If you want to join in the fun and be in with a chance of winning the frankly A-mazing prize package worth over £700! Including a Sew Crafty Essentials Sewing Kit and a Sewing Journal head over to Portia's blog to find the details.

Sammy and H 


Bloglovin / Twitter / Facebook / Pinterest / Google+ / Instagram
Makers Month: DIY Dreams


Well hello there!  We are getting towards the end of our Makers Month here, booooooo.  So I thought a little selection of other DIY's that H particularly has been really wanting to make recently.  Probably all to do with having my own place and starting to run out of money to do all the fun stuff.

I found all these great DIY's online and so I will share where I found them.

From Top left; Fall for DIY is definitely a favourite of ours to look at for inspiration for all kinds of tutorials and this Copper Magazine rack does not disappoint! It's the colour and finish of the season, copper and makes a great place for all the Mollie Makes and Simply Sewing magazines that seem to stack up!  Magazine addict anyone!

Top right is over to Flossie Teacakes and this cool rope bowl.  We all need lots of storage space and why not make this great bowl to match your decor and of course have some fun in the meantime.  I can see fruit bowl, key bowls and just bowls for bowls sake in my future.

Bottom left, well just look at it!  I found this amazing succulent dish on Little House on the Corner.  We all know that succulents are just the coolest thing ever and that we need somewhere to put them.  I love the idea of having a little garden of succulents, especially as I live in a flat and don't have a garden of my own.  Now, just to not kill them!

Lastly, but by no means least I found this tutorial on Hester's Handmade Home to turn a book into a Tablet holder.  I met Hester briefly at a B&Q Masterclass with Charis Williams a few weeks ago and have been a little obsessed with her tutorials and You tube Channel.  She also has a book called Furniture Hacks, which has some great ideas.

I think that might be enough to get me started, I also have some Valspar paint from the B&Q masterclass event that I am itching to paint everything I own with!

What's on your wishlist to make at the moment, have any of these DIY's given you an idea of what to make next?  Let us know in the comments below if you have made any of these or there is something you have on your wishlist to make. Check out our Pinterest board DIY Dreams for some more inspiration.

H,xxx


Bloglovin / Twitter / Facebook / Pinterest / Google+ / Instagram

Makers Month: Instagram Favourites

It is no secret that we LOVE Instagram, and we know we are not alone in trying to find the best accounts to follow on the photo sharing platform. Especially for makers month we have rounded up our favourite designer makers that you should all be following too. Don't forget to follow us @liveit.loveit.makeit We will be Instagraming from the Handmade Fair on Sunday, so you won't want to miss that!

,


So they are our faves, who are your fave Instagramers?  Link them up with your account in the comments so we can check them out. Are you off to the Handmade Fair this weekend? If you there on Sunday look out for us and come over and say Hi.

Have a lovely weekend whatever crafty delights you are planning.
Sammy xxx


Bloglovin / Twitter / Facebook / Pinterest / Google+ / Instagram

Makers Month: Let's Meet... East Wick


This month we thought it was about time that we sat down for a little chat with Roxi from the duo who make up East Wick (Hello Em!)  East Wick make Scented Soy Candles all handmade in East London and so perfect for our Makers Month and also considering Sammy has one in pretty much every scent, it is pretty much a firm favourite with us.

Anyway down to business!

Makers Month: Food Round-up


Well, we couldn't leave the food out of Makers Month could we?!?  After all, we all need a bit of sustenance to keep us crafting and reading all these blog posts.

So I thought I would try and find some Dairy Free and just darn tasty treats to keep us going, seem as though the weather seems determined to just be drab and make us all want to hibernate and eat!

From the Top left is a recipe from Lucy Bee, these Smoked Salmon and Broccoli Muffins look amazing.  Lucy has her own range of Coconut oil and as the oil of choice at the moment and a great alternative to butter for those of us who need dairy free.  You can also get a free little recipe brochure so that you can start using coconut oil from their website.

Top right is another Jamie Oliver recipe, have you seen his new Super Food programme?  I feel its going to be a new like for me and the book Everyday Superfood may have to be purchased!  This squash dhal looks like a great way to mix up my dinnertime and have some leftover for work lunches too.

Bottom Left are the cupcakes I made for my youngest nieces 1st Birthday Party - yes I know, I made them - super proud.  I adapted a coffee cupcake recipe from Iced Jems and made Frozen style dairy free cupcakes with some help from some sprinkles from Sainsbury's.  I basically just left out the coffee and added some vanilla extract to the cupcakes and blue food colouring to the icing and also made them with gluten free flour.  They went pretty quickly so that must have been good.  I wonder if anyone noticed!

And lastly in the bottom right is this Mango and Passionfruit Coconut cake which I really want to try using my new dairy free best friend of Pure sunflower spread.  They also have an Olive oil version and Soya version, but I find this one is the best for cakes and for spreading on toast.  It's all about multi-purpose items when you need dairy free!  They have loads of recipes on this site too, so no excuses of not knowing what to make.

So, that's the food round-up for September.  Now just to get on with some baking and cooking.  I have been doing a fair bit of batch cooking at the moment as with the darker days, it's nice to come home and not have to prepare a whole meal.  Plus it makes it cheaper for me, always a bonus.

If you have any recipes I should try or have tried anything I have mentioned in the food round-up posts, do let us know in the comments, would love to hear how other people adapt or find them to make.

Off to go food shopping for all these ingredients now!
H, xxx

Note: Not all photographs are my own, from original websites linked unless stated.

Bloglovin / Twitter / Facebook / Pinterest / Google+ / Instagram

Makers Month: British Stationery Wishlist


You know we are suckers for stationery around here and Makers Month gives us the best excuse to search out the best of the British paper pushers to add to our most wanted list. Who are your favourites???

Happy Jackson Notebooks  /  Ohh Deer Plan of Attack note pad  /  Studio Sarah Greetings Cards  /
Oh Squirrel Pencil set  /  Pygmy Cloud Paper Tape  /  Nancy and Betty Weekly Planner   /  Blogtacular and Lollipop designs Planner  /  Undercover UK Leather Ring binders  /  Oh No Rachio Notebooks

Have a great weekend
Sammy xxx

Bloglovin / Twitter / Facebook / Pinterest / Google+ / Instagram

Makers Month: How to Size Up a Paper Pattern


Being a plus size most of my life, means that most of the sewing I do involves scaling up patterns. Today as we are in Makers Month mode I thought I would share how I do that with one of the patterns I have done this with recently, The Bettine dress from Tilly and the Buttons. This is a great pattern to practice sizing-up on as it is reasonably straight forward to sew and the pattern pieces are simple.


I use a sewing curve, also called a French curve or a pattern master depending on who you talk to about it. It has two straight sides at a right angle and a steep then sloping curve along the other. Mine has lots of helpful measurements and guidelines on it which help with measuring and creating your own curves for pattern making from scratch. I am lazy and generally prefer to alter an existing pattern to making my own from scratch.


Most paper patterns have multi size options printed on the pattern sheets. you can use these to scale the measurements that you will need to use to size up, you will also need dressmakers tracing paper or you can use greaseproof baking paper. I always iron out the original pattern paper and my tracing paper before I start as both have usually been folded in a packet for some time. Take care not to scorch the paper, I usually set it on a wool setting/ two dots. My last tip before we start is to tape down your pattern and tracing paper with masking or washi tape so the layers don't move about until you move them.


Start by taking a look a your pattern pieces, some lines won't move but will need extending, some will need moving and curves will need shifting. Curves (in general) should not need to be altered, you can see that the curves don't change shape they just move, it will be the lines they are connected to that will be moving therefore the curves can just be traced into their new position.  

Your pattern should be taped to your table and the tracing paper placed over the top. 

Photo 1.  Trace all the lines that are not moving, in the case of the Bettine it is the centre fold and the waist, but extend the lines past the edges.
Photo 2.  Mark the end of the lines that need moving, for instance the armpit line where the curve starts. 
Photo 3.  Peel back the tracing paper and measure the difference between the biggest and the next size down. This gives you the measurement for where the next size up line should be. 
Photo 4.  Pop the tracing layer back in place and use the measurement to add as many sizes as need be to your pattern. I have added 3 sizes to mine by moving the line over three times the measurement that I took. 
Photo 5.  Draw your new line up to meet the marking you made for the end of the line, where you new curve will start. 
Photo 6.  Next is the line on the other side of that curve, the bottom of the sleeve. The position of this is affected in two directions, the line moves up and across. 

Photo 7.  You can see here I have added the measurement for one size at a time until reached the size I wanted, I find it easier with those fiddly bits to mark every size increment.
Photo 8.  Again, you want to measure the length of the straight line to where the curve starts.
Photo 9.  Mark clearly where the curve begins. You then want to un-stick your top sheet and slide it over until the curve on the pattern underneath is in line with the markings you have made.
Photo 10.  Then you can trace the curve exactly in place.
Photo 11.  Some lines will be easier to scale, the top edge of the sleeve for instance can be sized up following the diagonal line created by the sizes below.
Photo 12.  Again using the measurements from the sizes below you can add as many sizes as you might need to make your pattern fit your needs.


If you are also looking to lengthen or shorten your paper pattern, the pattern itself may have markings on it where you can do so. Tilly's helpfully do, so all you would have to do here is measure how much longer you want your finished garment to be and add in a section by allowing for that in your traced pieces. If you forget to add it whilst you are tracing, you can always go in and add in a section by cutting and taping an extra piece in place of by folding the pattern at that point.

This process is the easiest, most accurate way to size up or down that I have found but it is lengthy to explain. I do hope that my explanation is clear enough to follow and use for your own pattern sizing experiments. If you are unsure check out this article from Craftsy.com for another style of up-sizing. 

If you have any questions, feel free to ask in the comments and I will do my best to answer them. If you are interested in Tilly's patterns we now stock the full range of printed patterns at Sew Crafty Online. Tilly has a great post on her blog about adding a seam allowance if the pattern you are using doesn't have one (all Tilly patterns have the allowance included) if that is something you are interested in. 

I hope that might help any of you that are above or below standard pattern sizing but desire a handmade wardrobe. 

Sammy xxx

Bloglovin / Twitter / Facebook / Pinterest / Google+ / Instagram