

Autumn DIY Bucket List

Live it: Packhouse


Some of it was a bit above my price and space range, I only have a flat after all. But a great place to look around and find something lovely for people as presents. I managed to come away with only one thing, an old cutlery tray, that I am going to use for some of my printing equipment - not for cutlery obviously!
Have you been to Packhouse? It would take you a little time to go around, but well worth a visit. It reminded me of our trip to Homebarn in Marlow, way back in 2013!
H, xxx

Bloglovin / Twitter / Facebook / Pinterest / Google+ / Instagram
Creativity at Work

I made this Enormous Crocodile character hat for an upcoming workshop in Half term - my job means that I work with school visits, adults and all the holiday activities and so there are so many things to make! Ace!
We have a Quentin Blake exhibition coming up - which I am super excited about as he is one of my all time favourite illustrators! This means that during the holidays we try to tailor some of the workshops to the current exhibition - cue my excitement to get creative with his Roald Dahl characters. One day I want to own a Quentin Blake print, I just need the cash and to decide which one of course!
Now, I have made UFO costumes, 3D jigsaw heads and many a diorama, but I still get really happy when something just works how I want it to and everyone else likes it! There is nothing like the added pressure of making sure that your colleagues and all the people who are due to use or make something similar, like what you have made too.
The workshop is for children to make their own character costume for some of Roald Dahl's much loved characters, Charlie and the Chocolate Factory, Fantastic Mr Fox, The Witches, BFG and of course The Enormous Crocodile. So this means samples of all of these things so that the children and their adults will have an idea of how to make their costume. It will by no means be the whole thing and so a few little elements have been made so that the idea is there.
This of course will be The Enormous Crocodile and I love it! Made from card, tissue paper, green paper and paint, I think he looks pretty cool. I know what I am going to be for Halloween now! ha, ha.
Which Roald Dahl character is your favourite? I love the way Quentin Blake draws and gets the personality of the characters just right. Dahl and Blake had a great relationship and it just worked.
Right, off to do my next thing, printing samples for a school visit this week, busy busy.
H, xxx
Bloglovin / Twitter / Facebook / Pinterest / Google+ / Instagram
Make it: Faux Marble Cushions on Oh No Rachio

If you are ever interested in having us guest post on your blog get in touch at liveit.loveit.makeit@gmail.com
Have a lovely weekend.
Sammy xxx
Bloglovin / Twitter / Facebook / Pinterest / Google+ / Instagram
Makers Month: Super + Super Retro Lampshade Tutorial

Its our final day of Makers Month and what a treat we have for you today. We spoke to the very lovely Amy at Super + Super who are based in Brighton and now Nottingham, who gave us one of their lovely tutorials from their Printmaking book. Go check out their other books too, they have Embroidery, Papercutting and Crochet too.
So over to Super + Super. This is one for the textile lovers and is a slightly more technical project. Try to source some second-hand or vintage fabric to give this 1950s-inspired print a little extra authenticity.
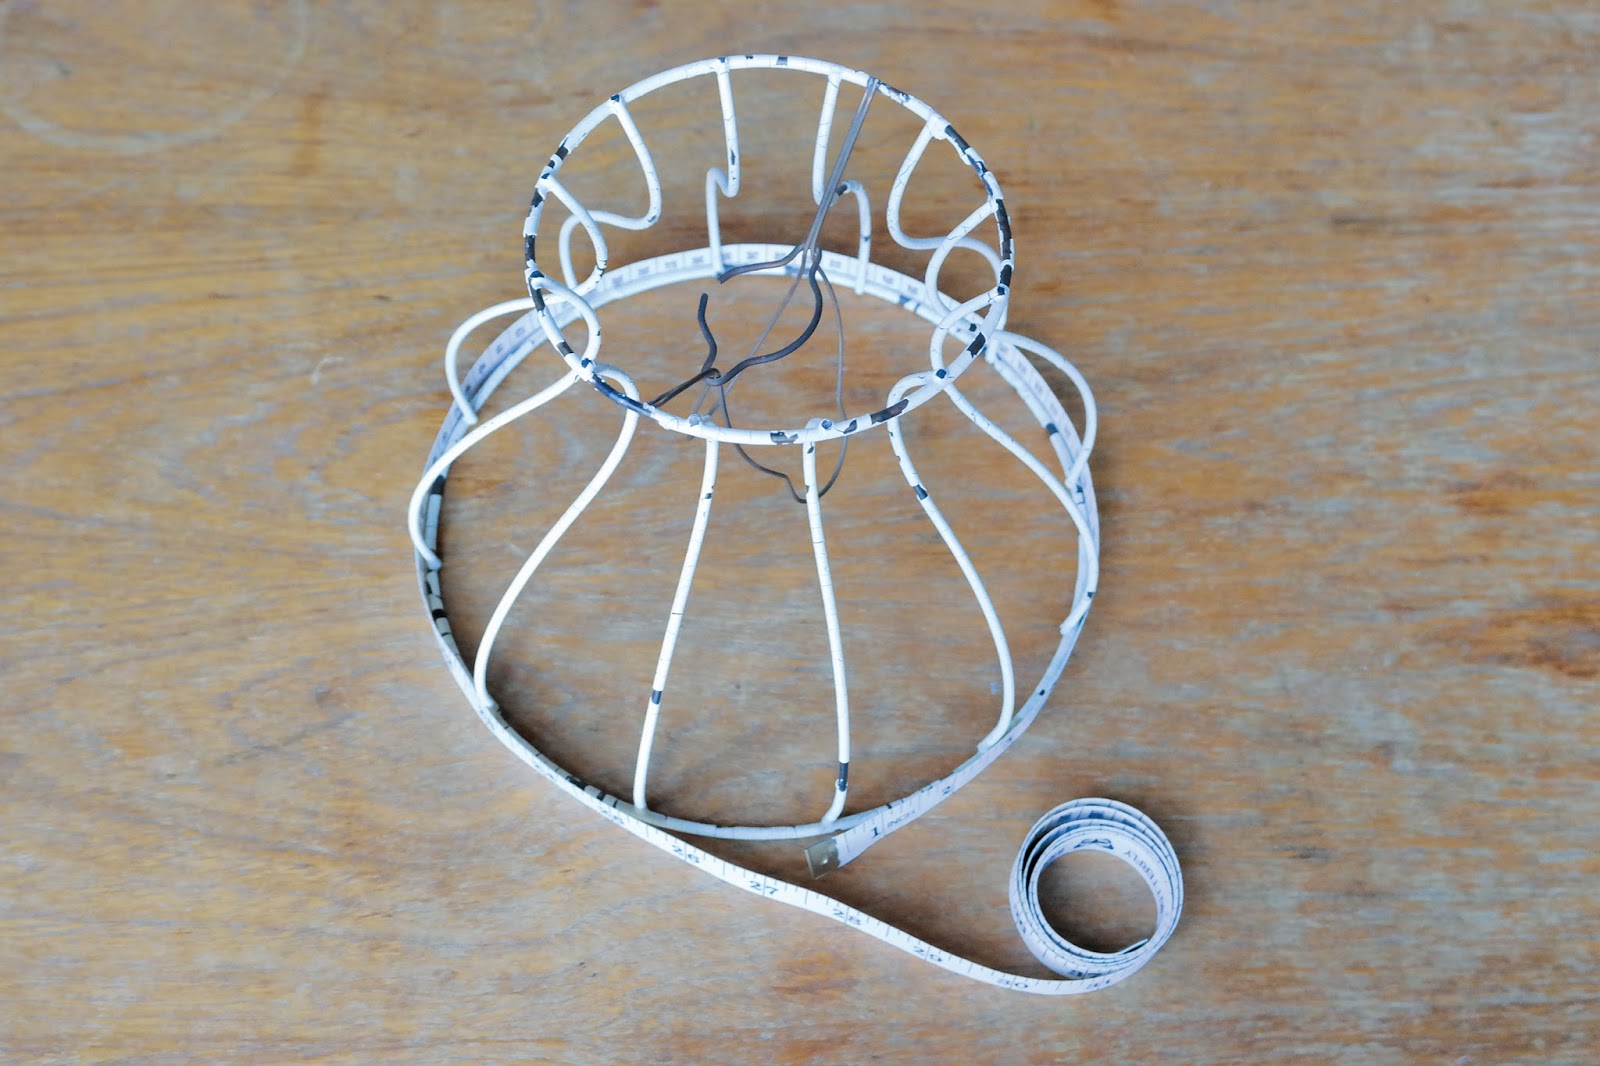
1. Remove any remains of old fabric covering your lampshade frame. Measure the top and bottom diameters of the lampshade. The biggest measurement will be the length to cut the fabric to.

2. Now measure the height of the lampshade. Once you have these two measurements, you need to add 5⁄8in (1.5cm) at each end for the seam allowance.

3. To make the stamp take a 20in (0.5m) long piece of string and wrap it around the width of your wooden block and tie in a double knot at the back. Then wind the string around the block about eight times. Move the string around a little until you are happy with the spacing.

4. Pour some ink onto an old plate and load up your sponge roller.
Tip! Sponge rollers are cheap and are the best way to spread your ink evenly, especially on bumpy surfaces such as this string creation.

5. Working from left to right or vice versa, print in straight lines across the length of your fabric. Turn the block 90° to the left and right between each print to alternate between horizontal stripes and vertical stripes.

6. Once you have covered the entire surface, hang the fabric up to dry. You can speed up the drying process with a hairdryer.

7. Pin 5⁄8in (1.5cm) hems along the longest sides of the fabric, which will be the top and bottom of your lampshade. Later these will be used to thread a drawstring through to fit the fabric to the frame.

8. Sew along the length using straight stitches in a colour of thread that matches the fabric. You could use a machine for this if you have one. Secure at each end by sewing a few stitches backward and forward at the start and finish.

9. Now, with the right sides together, pin the two short ends together and sew 5⁄8in (1.5cm) in from top to bottom. Secure in the same way as you did in step 8.

10. Now press the fabric to fix the ink and remove any creases, then turn your tube the right side facing out. Check it fits over the largest part of the frame, then remove again. Using your embroidery needle, thread long lengths of string through the top and bottom hems, gathering as you go.

11. Place the fabric over the frame and pull the strings to gather around the top and the bottom edges of the frame, securing with a bow.

12. Take your ribbon and tie it around the neck of the shade to pull the fabric into shape. Finally, readjust the string at each opening before knotting securely and trimming any excess length off.

Thanks to Amy and Super + Super for the great tutorial, you can take a look on their website or facebook page for more and follow them on Instagram @supersuperhq.
And Thank you for reading all our Makers Month Posts, we have had great fun once again with our themed month of Maker joy. We hope you enjoyed them too, which was your favourite? Let us know in the comments below.
See you Friday!
H & Sammy
Bloglovin / Twitter / Facebook / Pinterest / Google+ / Instagram
Makers Month: Claireabellemakes top 10 tips for selling at craft markets

Craft fairs and markets are our favourite way to connect and shop with designer/makers. We get to have a chat with the super talented folk that create the handmade things we love. But lets face it they can be daunting for sellers who spend a lot of time creating alone. We asked our lovely friend Claire, designer and blogger at Claireabellemakes, to share her top ten tips for getting organised and selling at craft markets to make the whole thing a little easier to navigate.
have sold there before to ask how they found it. The best markets I have done have been those that were recommended to me by others. Ask the organiser about footfall and what kind of marketing they will be doing to promote the event.
2. Do a mock set up – Each fair will have a different sized booth or table, so be sure to measure out the space provided to see how much stock you might be able to display. I like to tape out the table size in my studio then work out how I can arrange stock accordingly. Take a photo. Then, when you arrive at the fair, you will have a reference picture and it will be quick to set up!

3. Ask for help – Personally I find fairs to be one of the most exhausting aspects of my business and they can often be unpredictable. I did one market which was in a gazebo outside during December. I had anticipated it would be cold, but I didn't realise how cold I would get after 8 hours of standing behind a stall. Ask friends to bring you hot drinks and extra socks when needed! As I also have health issues, I often ask a friend to help with my stalls, especially if they require travel to the venue. Having someone there who can relieve you for a rest period or loo break is invaluable. You could offer to pay them a small fee or even make them something custom as a thank you. I will always pay my helper’s travel and give them lunch and then we decide between us how they would like to be repaid for their time.

4. Take a ‘useful box’ – I like to bring along a box of useful items that I could need for any fair. This box includes pins, string, tape, scissors, chalk, notepad, pens, pegs. It is invaluable to have these items on hand and although you may not need them for every market, you will make friends with people who are in desperate need of string or tape as they wont forget you! I also make sure to bring a stamp with my web address on in case any business cards run out. Sometimes you can never tell how busy a market will be!

5. Take water and snacks – Some markets can be long and with travel, set up and set down, you may work long periods without a proper break. Be prepared and take plenty of water with you, as well as snacks. You will be so pleased to find an apple in your bag once you hit the train home and your fair fatigue is setting in.

6. Keep cash safe – I used to take a cash tin to markets, but felt very uneasy about leaving it when visiting the ladies even though it had a little key. In comes the Bum Bag, or as the Americans call it, the Fanny Pack. I had one in the 80s and it rocked my world, so I made sure the one I use for markets is just as amazing. Cue this amazing glitter bum bag from Beksies Boutique. It helps to keep all cash on me as I then know where it is at all times.

7. Accept cards – As well as taking cash, I always make sure to accept card payments at any markets. Customers are likely to spend more if there is an option to use a card. Portable card machines such as this one from Payleven, are really easy to use and connect to smart phones via Bluetooth. There are even options to send receipts to customers and having a machine will provide your business with credibility.
8. Offer deals - I want my market customers to feel as though it is worth visiting my stall, so will often offer exclusive deals for that day. For example, 3 cards for £6 instead of £2.50 each. Share these offers on social media prior to the event and it may make people want to visit you just for the deals!

9. Inventory – Prior to each market, make a list of all stock you wish to take along and print this out for your records. Each time an item is sold, tick it off on the corresponding inventory list. At the end of the day, you can check stock against items sold and ensure that each sale is accounted for. It takes a bit of preparation, but saves tons of time when cashing up at the end of the day and even when you are filing your accounts.
10. Network – Each market opportunity is a fantastic way to network across the community. Get to know your stall neighbours and follow them on social media after the event. Keeping in touch with other vendors could lead to collaborations and opportunities.
Thanks for having me today guys! I've really enjoyed sharing my tips on preparing for craft markets and I hope your readers will find them useful. Why not take a look at my visit to one of my favourite markets ever, Renegade in London or a video of my time as a vendor at BUST Craftacular.
Thanks for sharing your tips Claire.
Sammy, H and Claire xxx
Subscribe to:
Posts (Atom)