

Showing posts with label weaving. Show all posts
Showing posts with label weaving. Show all posts
Lets Meet: Peas and Needles
Make it: Weaving in the Round

Anyway, I recently saw a pin that made me very excited. It showed an embroidery hoop being used as a round loom! My little mind was blown (it doesn't take much these days) after some research I had a go and now I am hooked on weaving all over again.
Now that I have practised a little, I thought it would be something that you guys might like to try too. Once you have the basics down I bet you will be as addicted as me!
You will need: An embroidery hoop (the one I have used here is a 10") strong string or thread, a selection of yarns, a wool needle or bodkin and some small scissors.

Step 2. Pull the thread straight down over the bottom of the opposite edge of the hoop, take it over the edge and to the back.
Step 3. Bring the thread up and over the downward thread.
Step 4. Then bring the thread over the front of the hoop about 1 inch away from where you started.

Step 6. Make sure to keep the centre crossing over, until you reach all the way around the hoop.
Step 7. Before threading the last strand take the thread around the centre a couple of times to keep it all together.
Step 8. Take the last strand up to meet the first thread and tie it to the end you left at the beginning.

Step 10. Starting at the centre, take a length of yarn on a wool needle and start threading in and out through the strands.
Step 11. Keep threading in and out back and forth.
Step 12. Use your needle to keep the yarn tight to the centre and keep moving around the hoop.

Step 14. Keep going, changing colour when you want to. Mix it up with different colours and textures to keep it interesting.


For more instructions on weaving and different kinds of techniques check out this cool blog The Weaving Room, Kate has lots of really great tutorials and videos on lots of different kinds of weaving.
As always, if you have a go at this tutorial please #livelovemake on Instagram or Twitter, as we would love to see them.

Crafting in the Car, Loom Weaving


Have you got a long trip to take? what will you be 'crafting in the car? or on a plane? let us know what summer crafts you have planned.
Sammy xxx
Live, Love, Make, Like, Share, Follow, Tweet, Pin, Add, Enjoy.
Bloglovin / Twitter / Facebook / Pinterest / Google+
Live it. Olympic Torch, Love it. Hunger Games, Make it. Wicked Willow Weaving

Last Thursday I managed to pack quite a lot of random activities in to one day, I was the very epitome of Live it Love it Make it! Just not sure that all in one day is such a good idea, I am still trying to recover.
Anyway, the first of my activities was thanks to the Lovely Maria of Happy Cakes! fame. She invited me to attend a willow weaving workshop in her garden. I have tried many crafts in my time but I have never done anything like this so jumped at the chance, in addition of tea and cake was a big deciding factor.
I arrived secateurs in hand and was greeted by Maria and a cup of tea. Susan our teacher for the morning, took us through what we were aiming for and let us choose our materials, I went for the shorter dark willow as my base, motivated by size and ability to fit it in the car, I began to whittle the ends in order to spear them in to the ground and be able to weave around them freely.

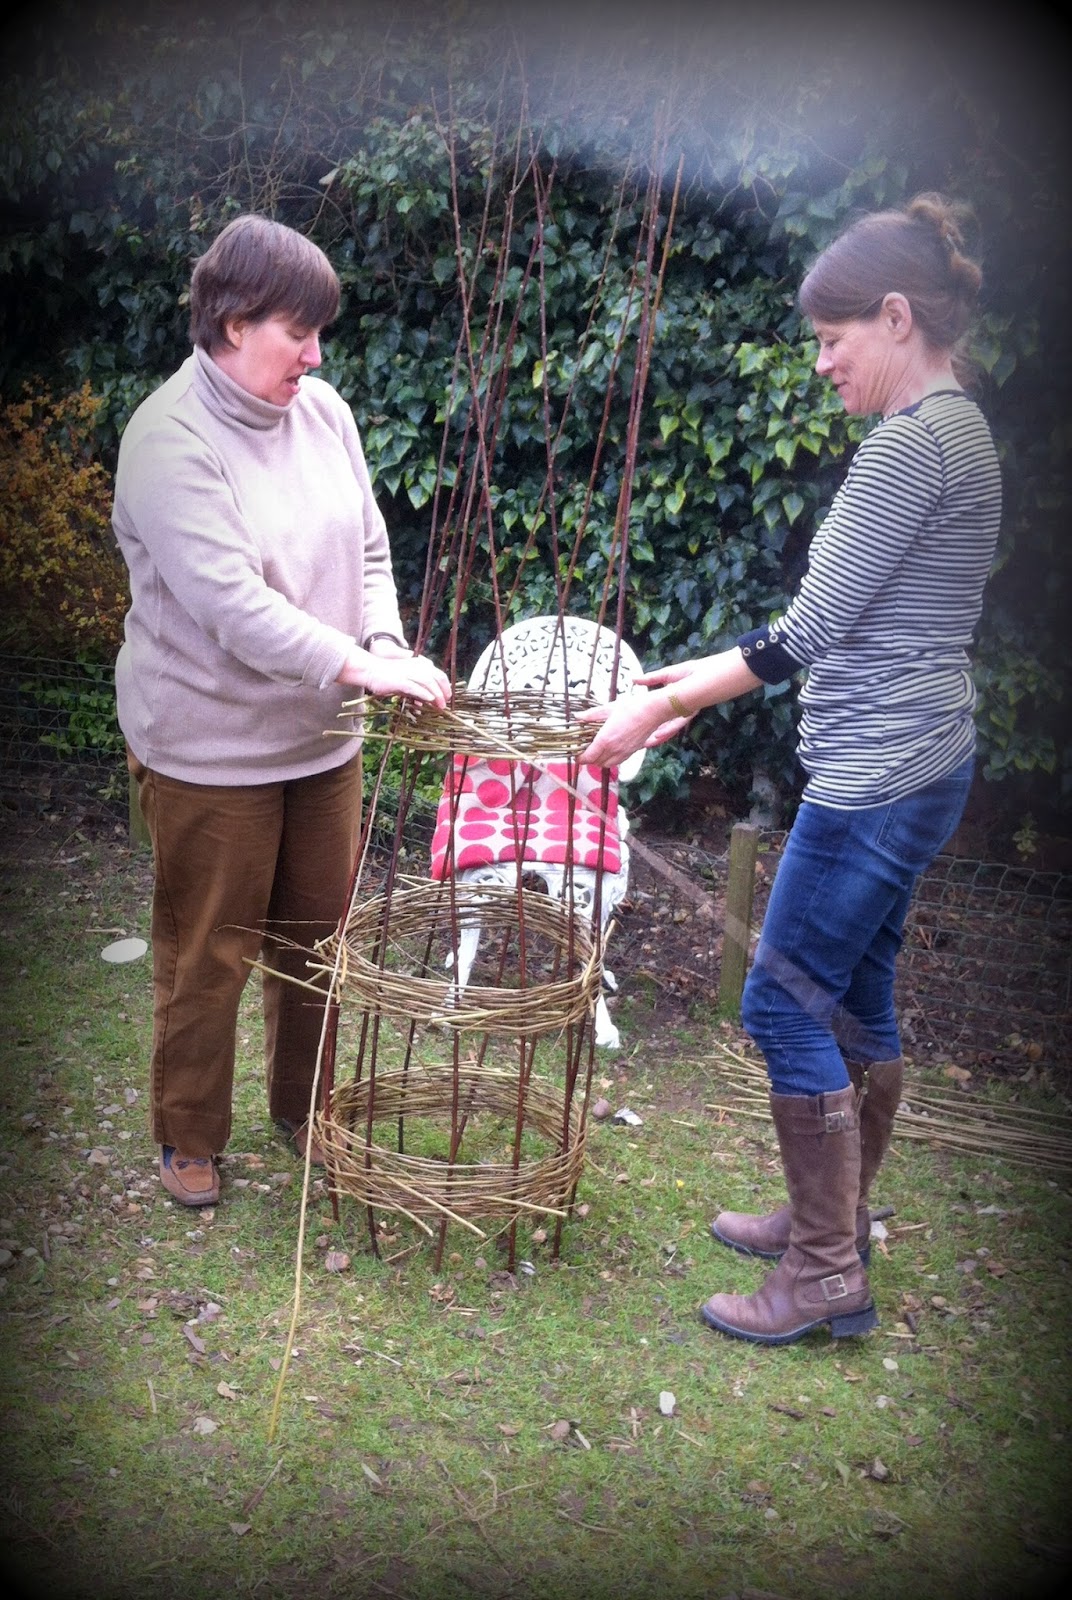
 Maria and Steph getting their standing willow, whittled and in to place.
A photo by Steph Smith of me beside my willow frame. Do you like my wellies???

When we were all set, Susan showed us the fun part, the weaving,
making sure we had the right technique to get going.
We used green willow and began by bending one strand then weaving alternately in and out, making sure to keep the spacing as even as possible
Not as easy as it sounds...

Never the less, our first layers started to take shape, this is Susan's, you can tell right, super neat and tidy.

Finishing of with a neat tuck in and then on to the middle layer, remembering to pull it in a little tighter to start the inward curve.
The nicest thing about getting together with a group and doing an activity like this is you get a chance to have a natter as you work, it was really nice to get to chat with some lovely new friends and friends I already knew, like Steph, one of my lovely customers at Sew Crafty and Deborah from Craft Coop.


By this time my obelisk was taking shape, and I was getting jibes about being neat, not some thing I am usually known for.
As we all finished off our second layer it seemed like a good time for a break, and nothing better to keep us going than (the now famous) Lemon drizzle, Yummy Carrot cake and a nice cup of tea. Yes I did have both, it would have been rude not to.
Also I would like to point out I am mega jealous of Maria's crockery collection, everything from Blue and white wear to Cath K! If you need somewhere to store any of it whilst you have your Kitchen done Maria, my house is open :)

After tea, time for top layer and tying off, by this time the garden was looking very impressive, everyone had done such a good job, and everyone had really enjoyed themselves. Even Maria's gorgeous Chickens were impressed!


I uploaded this to Instagram on my way back to work, a cute little collection of the days stages. I'm @SamanthaClaridge if you want to follow me there. I love my obelisk, so much so that I have covered it in Easter goodies and stuck it in the Window at work, and it has been much admired.

Thank you to Susan for teaching us all and thank you to Maria for inviting me to come along, and to all the Ladies for such a nice 'Make it' morning
All of us proud willow weavers posing with our achievements. Lovely I think you will agree.
For the next few hours I had to have my work head on, the Sun was shining so we flung the doors open at the shop whilst I got my head stuck in to customers questions, sales and VAT.

'Living it'
By 6pm it was time to put my community hat on and head to Maidenhead town hall for a meeting about the new parking scheme and the Portas pilot bids and Olympic excitement!
Maidenhead is putting in a bid to become a Mary Portas Pilot Town, Yay!
And as our train station is an official Olympic arrival venue for the Dorney lake events we also are on the Olympic torch route, quite excited as it will be running right passed the front of our shop!!
By 7.30 my head was full of ideas, but It was time for me to meet up with my friend Verity, to go and watch a preview screening of 'The Hunger Games'
V had recommended the books to me last year on holiday, and I had ended up reading all three in a week. We had both been waiting in anticipation for the first of the movies... and we were not disappointed!
'LOVING IT'
I don't normally share my drawings with many people, but as it is appropriate I thought I would share my pencil drawing of Jennifer Lawrence, starlet of Hunger Games, with our lovely Blog followers.

So it was a busy day, but a great one.
I wish I could live it, love it and make it every day!
Much Love
Sammy xxx
Subscribe to:
Posts (Atom)