Easter DIY's


Easter is nearly here and the School Holidays have begun which means I will be knee deep in PVA glue and craft materials for the next couple of weeks.  Which got me thinking of some other great DIY's out there that you could do, with your children, or just for yourself!

So, what better way to find some ideas, than through the beautiful world of Pinterest!  You can follow us here.

First up is this great idea for a bunny mask for your little ones, how cute will they look on Easter weekend looking for their eggs with this over their face!  Cuteness overload!

To the top right is this great tutorial for making foiled eggs for decorations.  We did an egg decoration workshop last year for Easter and that is definitely the last time I am blowing eggs (60 eggs later) - but this tutorial from good old Martha, has me thinking I might do a few this year.

Bottom left is a hair raising egg for Easter, sorry, couldn't resist!  Who didn't love sowing cress and watching it grow when you were a child, now it's time to reinvent your youth and get some of your eggs having a bit of a do for the Easter weekend with these Eggheads.

For the last one, it's another version of something I have made at work - these are not mine though.  These Peg Eggs are so cool and you could do any kind of opening and closing characters, we made sharks and monsters for ours last year.  But with the Easter theme, maybe bunnies or children eating eggs inside?

So, which one would you make first?  I am making some super cool peg superheroes for one of my workshops at The Lightbox this year and I am very excited for it, it lands on my birthday, what a way to spend the day hey!

What do you think?  Can you see which superhero they all are?
H

P.S.  Photos are not all our own, they have been taken from the websites linked within the post.  Apart from the Superheroes, that's all mine!

March Monthly Favourites

Bye March, Hello April, when did you creep up on us? 

Skincare is not normally something we share here but I just had to mention some beauty products I have been loving this month. Liz Earle Hot Polish Cleanser and Origins Original Skin Serum have been my go-to skin products. I have been using Liz Earle for a while, but the serum is a new addition and I am so happy I picked it up. I have middle aged problem skin and I have found these two are the best combination for keeping my skin as clear as can be.

Another thing that has been helping my skin in this spring weather is drinking lots of water, Something I have not always been very good at. But since investing in a Bobble Jug and Water Bottle it has been so much easier. The bottle filters tap water as you drink it and isn't that the cutest water filter jug you have ever seen. They come in loads of colours too, I have a blue set for home and working out and a pink bottle at work.

My fave Etsy shop this month is Strangely Yours. I am obsessed with this Camera Locket and I love the unique Wedding guest books. I love how detailed and cute her items are.

I am starting a collection of these yummy Accessorize Wallets I can never find them online, but they always have lots when I go in store and they come in loads of awesome colours.

We got sent some Hope and Greenwood treats recently and oh my! They are yummy, the packaging is super cute, vintage style so makes for awesome gifts. I have already put an order in for Easter treats for all our family. My fave was the Butter Almond Crunch, just like eating giant chunks of Daim bar.

What have you been loving this March? Link to your monthly favourites in the comments below

Have a lovely weekend
Sammy xxx


Bloglovin / Twitter / Facebook / Pinterest / Google+ / Instagram

Make it: Liberty Print Button Rings

A really lovely way to jazz up an outfit is to add a colourful accessory, what better to add a little spring in your step than to pop on a jazzy ring. These are made with cover buttons and Liberty print fabric scraps. They are super easy and you can personalise them to give them as really thoughtful gifts. 

March Food Roundup

This month has seen spring hit and my desire for some new foods.  I am always about eating a bit healthier and I tend to stick to the same old food's I already know how to make, I'm just not very adventurous in the kitchen.

With Masterchef also giving me a bit of inspiration - anyone else love that programme?  I thought I would buy a few new ingredients and make this little lot.  These are not my versions, these are from the websites where you can find the recipes.

So, from top left, we have Iced Jems Vegan Chocolate and Banana cupcakes, who doesn't love a dairy free cupcake!
Next, I saw this Farfalle Pasta with pancetta with peas recipe whilst browsing You tube the other day, the chef Gennaro Contaldo is hilarious and makes everything sound amazing!

Then there is Madeline Shaw's Vegetable Chilli Con Vegetables with Guacamole, which just looks super lovely and I really can't wait to make this one, that's tonight's job.

and, last but definitely not least is this Chia Seed and Coconut pudding which I had in Le Pain Quotidien the other week and have been dreaming about making it myself.  Made from cocount milk it tastes just like a pudding made with cream.

Everytime I do one of these roundups I get really hungry and today is no exception.  If only I bought the ingredients for lunch!

H

Bloglovin / Twitter / Facebook / Pinterest / Google+ / Instagram

Love it: Sammy's March Wishlist


There is so much on my wishlist right now it is literally bursting with homewares and accessories I just had to share my spring inspirations with you. I am craving new trainers and I just adore these Vans which combine two of my fave things, Alice in Wonderland and Liberty fabric! This Jewellery box from Urban is just beautiful, it would make my collection look like a shop display. Whilst I was on their website I also found a yummy new sofa too, I might be on the lookout for something similar very soon. 

Hope you all have a lovely weekend
Sammy xxx


Bloglovin / Twitter / Facebook / Pinterest / Google+ / Instagram

Let's meet: hello DODO

This month's Let's meet is hello DODO, now if you have never heard of them, they do the most amazing screen prints on posters, T-shirts, badges and bags, phew.  So we had a little chat with Ali and Jam, the team behind hello DODO.

Cut Out & Keep Crafty Superstar + book review

We have something a little different for you this Monday.  We have been working in collaboration with the US website Cut out & Keep and will be their Crafty Superstar for this week.  This basically means we have a tutorial a day going up on the site for the next 7 days! exciting.  We can't wait to see what the Cut out & Keep readers think!

and talking about Cut out & Keep, they also have a book out this week, Around the USA in 50 Craft Projects.  We were lucky enough to be sent a copy and so we could have a little look-see before it came out.

There is a great Index section which pulls out all the areas of the USA and where the projects are from.  Obviously for us UK folk it is all very different to some of the projects we would get here, but that's what makes it fun, right!

The paper used for the book is like alot of the craft books around, that nice thick matt paper, which unfortunately seems to have dulled some of the pictures, but I love the feel of this paper, so that's a good start.  


The projects are quirky and fun and are all quite simple to make, which is always nice.  They go from food recipes, to craft items and present ideas.  Mostly they have these round pictures that take you through the steps which is a nice touch.

The whole book is quite thick and has so many different projects that there is bound to be something for everyone.  I really like the shopping list style tags for each project, it's the simple ideas that make books different.

A few of my favourite projects are the Cowboy hat bowls for Mexican food, Neon sign chalkboard and movie night ideas to name but a few.  I think some of the projects would definitely work better for the USA audience, but really that is the where these guys are from, so that's not a bad thing.

It's a really fun book and so great for a present idea for some very different projects which are simple to do.  Plus if your having a party, some of those recipes are just that little bit different from the norm and so would make for great party pieces.

Don't forget to check out the Cut Out & Keep website this week too for our Crafty Superstar projects.

H

Bloglovin / Twitter / Facebook / Pinterest / Google+ / Instagram

Review: Printing My Own Fabric with By Hand London

Last year we started stocking By Hand London patterns at Sew Crafty, I loved the unique styles they offered and the packaging is to die for (I am a sucker for good packaging).  A month or so later I supported their Kickstarter campaign to start a new branch of their business, bespoke digital fabric printing. A few weeks ago I got down to designing and printing some fabric for the first time.

I thought it would be a great idea to share my experience with you guys, *spoiler alert* I am a little bit addicted to designing my own fabric and have lots more designs planned!

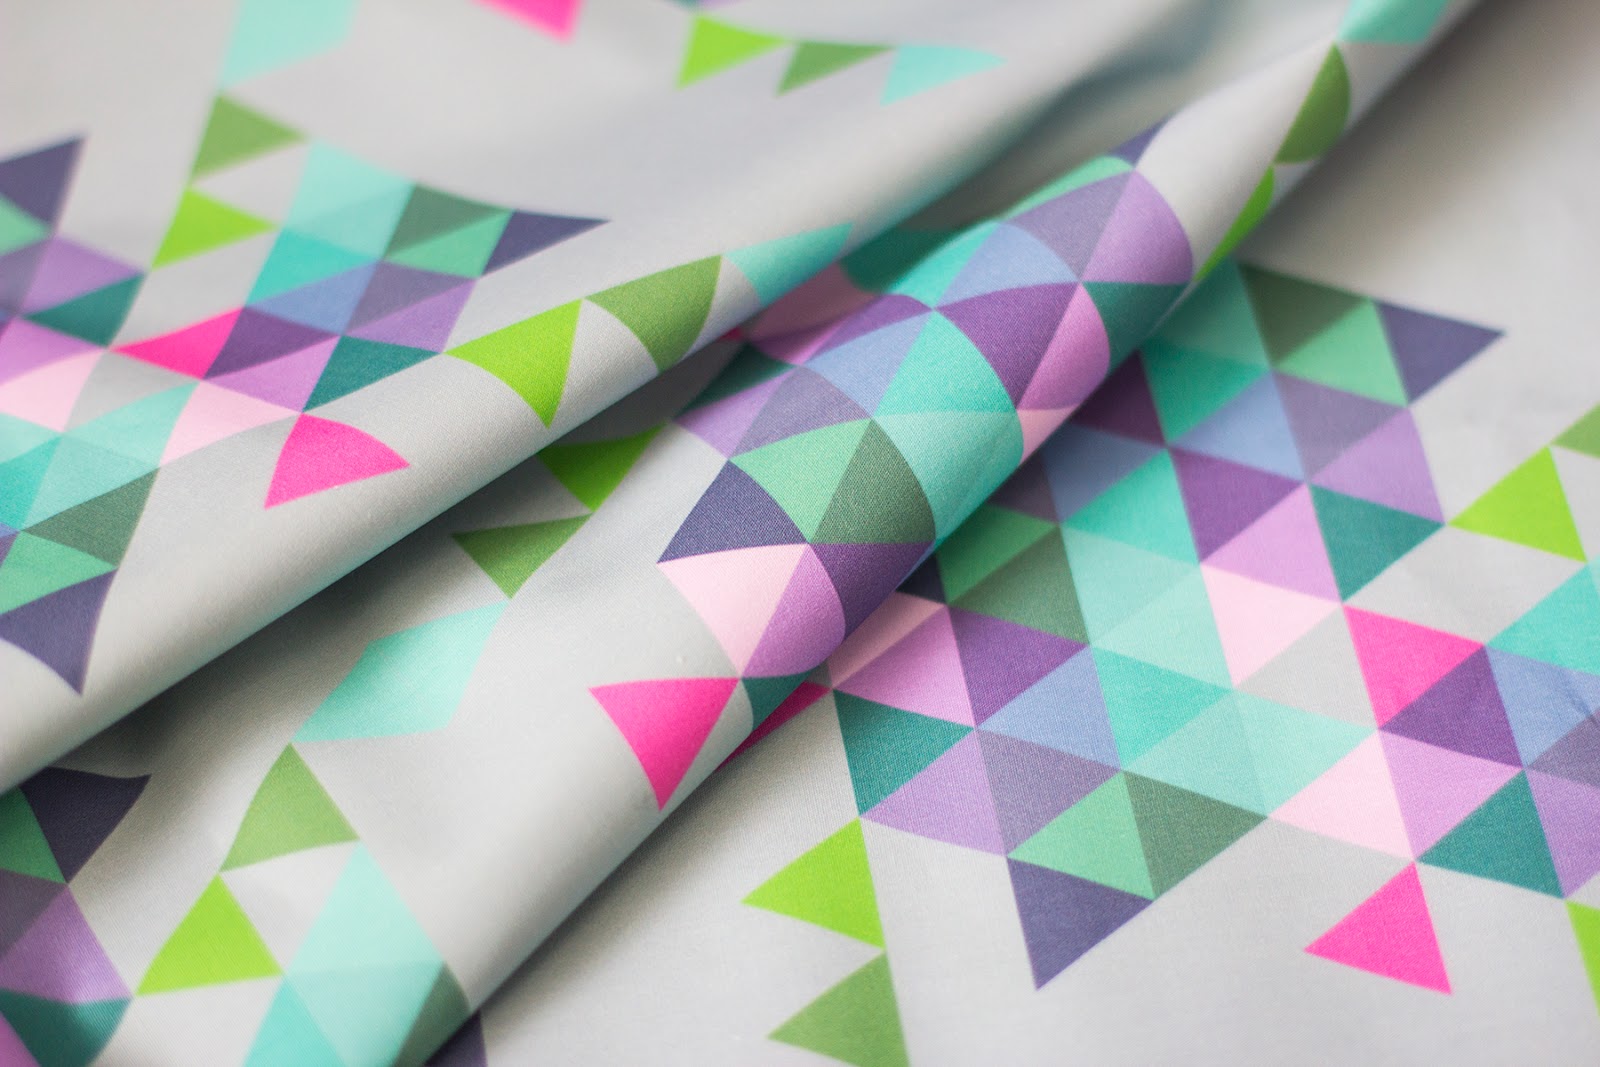
You will need to start by creating a digital design, you can do this by scanning a drawing or creating digital artwork through Photoshop or other image software. I created this simple geometric design in Photoshop.

Once you have decided on your design you would upload it to the By Hand London website and start laying it out

You can choose different tiling options and enlarge or reduce your image to get the best look for your design. This view shows my design over a fat quarter with the smaller tiled option.

And below is the design at the biggest tiled option again over a fat quarter.

I found the website really simple to operate and easy to experiment with tiling and size options for my fabric. At the final stage you can choose the amount you want to buy and if you choose to, view your fabric over a metre area. 

Now some of you may think that £19 per metre is a lot of money for fabric, but if you think how much you pay for normal designer cotton prints for instance about £12-18 per metre? Getting your very own design digitally printed onto high quality cotton is a very good price.

I was so happy when my fabric arrived, I am totally in love with the print and the colours were just as I had imagined them to be, they are a very good match for the colours I chose on my computer screen. The quality of the fabric is just lovely and the printing is crisp and clean.

I said at the beginning that I was in love with designing fabric and I am totally in love, I am starting a sketch book just for fabric designs. I would absolutely recommend By Hand London for fabric printing in the UK. The process was fun and easy. The results are brilliant and the quality is beautiful. I can't wait to make my fabric into the skirt I have in mind for it, I will share when its ready.

I hope that has made you excited to have a go at designing your own fabric, Have you ever done anything like this? Are you waiting for your delivery? Let us know if you love By Hand London as much as we do!

Have a great weekend
Sammy xxx


Bloglovin / Twitter / Facebook / Pinterest / Google+ / Instagram

Make it: Chest of Drawers Update with Trinca Ferro

Spring is truly on the way and with spring comes sunshine, with sunshine often comes the realisation that your house is looking a little dull around the edges.  I do hope that's not just me that notices all those little dusty shelves as soon as the sun starts shining?  I had started some redecoration in our bedroom last year but stopped because I lost inspiration, so I was delighted when Trinca Ferro got in touch with us about their range of decorative handles.

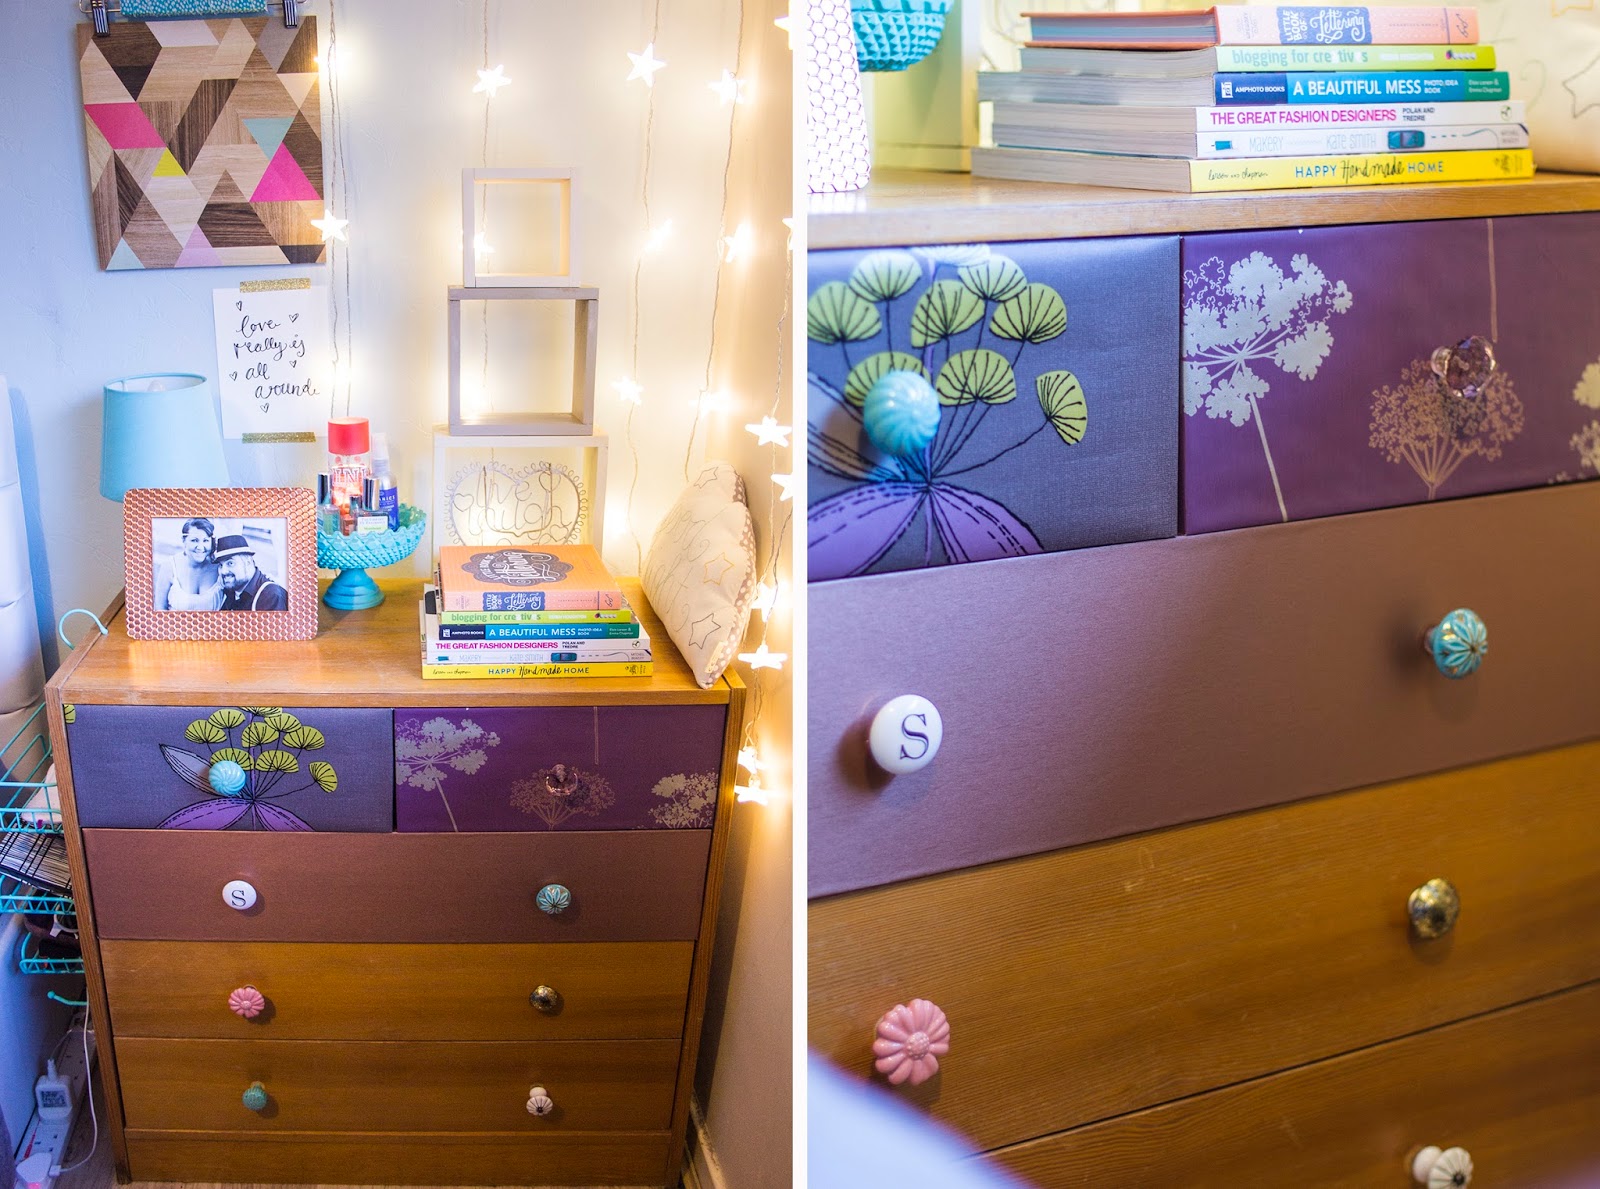
This is a 'before' picture of my chest of drawers that I started updating last year. You can see I added some wall paper samples and sticky back paper to some of the drawers that had surface damage but I hadn't been able to decide what to do next.

As soon as I saw that range of handles on the Trinca Ferro website my creative juices started flowing, the colours and textures were just what I needed to kick-start my plans for this area of my room.


I really enjoyed searching through the site and found some beautiful handles for my chest of drawers. I loved so many of the designs that I ended up choosing eight different styles to bring in different colours and textures.
I was so excited when they arrived, the quality is lovely and the handles looked amazing on the drawers. They finished off the look of the drawers and pulled together the new design of the chest really well.  

It meant that I was able to pull together a few pieces from elsewhere in my home to create a functional but pretty side table area. I am so happy with this little space, it makes me want to spend time in here now.

Another little update was this shower caddy that I spray painted to co-ordinate with the space. I hang it on the side of the chest to hold my phone when its charging and my kindle, hair bobbles etc. I think it makes a handy little addition.

 Which areas of your home could use a crafty little makeover? Anything you have started, but lost inspiration for? Sometimes it just takes a little spark to get a project to take shape.

Sammy xxx


Bloglovin / Twitter / Facebook / Pinterest / Google+ / Instagram

Live it: Knitting and Stitching Show Spring 2015

Last Friday we went to the Knitting & Stitching show in London, it's a bit of a pilgrimage for us and usually a good excuse for some lunch and some other shopping - well, when you are in the big smoke, it would be rude not to!

The show is on twice a year and this time of year it is Kensington Olympia's time and so an easy jaunt for both of us.

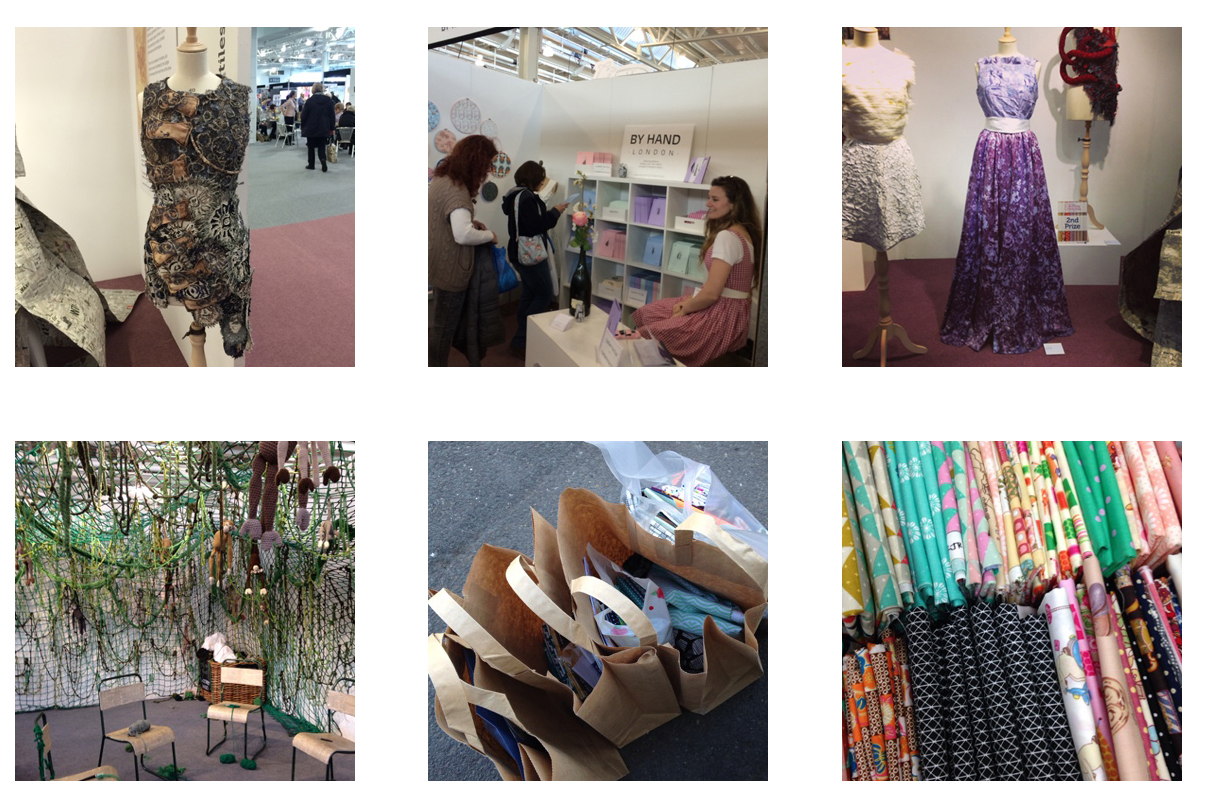
The show showcases lots of different shops, magazines and crafters in rows and rows of stands.  From Fabrics Galore and Abakhan Fabrics to Mr X Stitch and the very famous knitted farm.

We found some new products too from Crossstitch City Cushion covers from Hannah Bass to Maud's Fabric Finds and Floss & Mischief's bug crossstitches - some amazing new products.

Mr X Stitch had his usual delights of embroidery artists work, the Parrot above had embroidery around paperclips to make the feathers - ingenius, and the stitched chocolate bars were a real treat.

We saw some other familiar faces with By Hand London, with their new Sophia Dress pattern just about to launch.  Talking of dresses, there was the usual fashion awards they have every year and I noticed this purple number looked familiar, it was part of the Woking College show last year at The Lightbox, well done Hannah.

The lovely people at TOFT had made a knitted jungle where you could go and sit and knit.  We just loved the look of this jungle, how cool to be knitting in it?!

We came away full of new ideas for the blog and some extra fabrics of course - who can resist a fat quarter or 5!

Did you go to the show, what did you think?  Have you been to shows like this before?  Let us know in the comments.

H


Bloglovin / Twitter / Facebook / Pinterest / Google+ / Instagram

Make it: Notepad Cover and Pen Keeper

If you have been coming here for a while you will know that H and I are both massive stationery geeks. Lately I have been trying to use up some of my notebooks and bits that I have collected over the years and ran in to an realisation, if its not pretty I don't use it. So to solve this problem I have been using my scrap-booking stash to pretty up my boring old note books by making covers for them.

To make a notebook cover and pen keeper you will need: an A5 notebook, two sheets of 12 x 12 card-stock, your sewing machine, some elastic and thread.

Step 1. Stitch your two sheets of card-stock together, I like to use a zigzag stitch, I use a jeans needle when sewing paper.
Step 2. Line up the spine of your notebook with the join in your papers and fold one side over the front cover of your note book.
Step 3. Fold the cover of your notebook closed.
Step 4. Hold the back cover in place, re-open the notebook and fold the back piece of card-stock over the back cover.

Step 5. Take your notebook out of the cover and head back to your sewing machine. Stitch down the folded over flaps. 
Step 6. Pop your notebook back in and mark a line 0.5cm below the bottom of where the notebook sits.
Step 7. Take your notebook back out and stitch along the line that you have marked. Trim off any excess. 
Step 8. Slide your notebook into your new cover.

It is that simple, but it makes a boring functional notebook into a pretty Instagram worthy piece of stationery joy! Now for the cherry on the top, a cute and functional pen keeper. 

Step 1. To make yourself a pen keeper you will need some elastic. 
Step 2. Wrap your elastic around your notebook and cut it to size.
Step 3. Stitch it into a loop. 

Step 4. Pull the elastic around your notebook and mark where your pen will go using your finger.
Step 5. Stitch across to make a loop for your pen.
Step 6. Put your new pen keeper around your new notebook.


I am going to be making lists of lists now I have this gorgeous set of matching stationery.  I have used scrapbook paper for mine but you could use fabric or old maps, even paper shopping bags. The same technique would work for any of those materials.

Are you a stationery addict like we are?  If you have a go at making your own do share it with us using the #livelovemake

H and I are heading out to the Knitting and Stitching show at Olympia today, what are you guys doing this weekend? What crafty fun will you be having?

Sammy xxx


Bloglovin / Twitter / Facebook / Pinterest / Google+ / Instagram