Showing posts with label Envelopes. Show all posts

Make it. Fabric Envelope DIY

You may remember this post I featured in the summer? Well one of the things I want to do this year is get around to making some of these, what I call U.F.O's (Un-finished objects) So here is the first one on my DIY list, fabric envelopes. I thought these would be really cute to send to some of my friends who live a little further away, a nice change from an email or Facebook message and wouldn't they be just perfect for a special Valentine. 

You will need:
a paper envelope, iron on interfacing (vilene), two coordinating fabrics, thread, embroidery thread, a clear cellophane bag, buttons, scissors, a vanishing pen, an iron and if you have one a sewing machine.

You can of course sew these completely by hand, but I have a machine so I am going to use it. 

Start by cutting open the sides of your paper envelope and opening it out flat, we are going to use this as a template. Use your vanishing pen to draw around the template onto your vilene. Iron your vilene onto the fabric you have chosen for the lining of your envelope and cut it out about half a centimetre away from the line you drew to create a small seam allowance. 

Then you can use this to mark out what will be the outside of your envelope again using the vanishing pen, cut around the line you have drawn. Then you will have your two sides ready, you can see the vanishing pen line on the back of the lining which you can use as a sewing guide. Place the two sides of your envelope together and iron the folds in place. This helps with the next stage.

Place your clear plastic piece where you want your address pocket to go and cut it to size. Then with your pen mark the corners on your fabric. Put your lining to one side and stitch your address pocket in place, remember to only sew three sides so you can slide in your label. When that is on, put your fabrics right sides facing and pin them together. 
Sew around all the sides of your envelope leaving a small gap in your stitching so you can turn it through. Before you do trim your seams and cut small notches in any areas that are curved so they will look neat when it's the right side out.  Find the gap you left and carefully turn it through pushing your fingers into any of the points. It should look a little like a flat fish.

Take your iron and smooth it out to the edges, make sure you iron on the lining side so you don't melt your address pocket. Then fold the flaps into place and iron again. Head back to your machine and sew up both sides to create the pocket of the envelope. 
I chose to do a double button fastening by sewing on two buttons, one on the pocket and one on the flap with a length of thread to wrap around to fasten, but you could sew a button hole or pop some Velcro on the closure. All that is left to do is to pop a label in the address pocket and you are ready to fill your envelope with a letter, card or some trinkets to gift to your friends.

The fabric I used for my envelope was from Katherine Codega on Etsy.com, she has some beautiful fabrics and she designs them all herself. Isn't it pretty, I have been waiting to use this piece for ages.

You could make a bunch of these for a bridal shower or as wedding favours, as well as really lovely Valentines gifts.

What would you send in your fabric envelope? and who would you send it too? let us know in the comments. We would love to see if you have a go. With all our DIY's if you do, take a photo and share it with us on Twitter or instagram with the hashtag #livelovemake

Sammy xxx

Don't miss a thing follow us on Bloglovin

Make it: Fabric envelopes


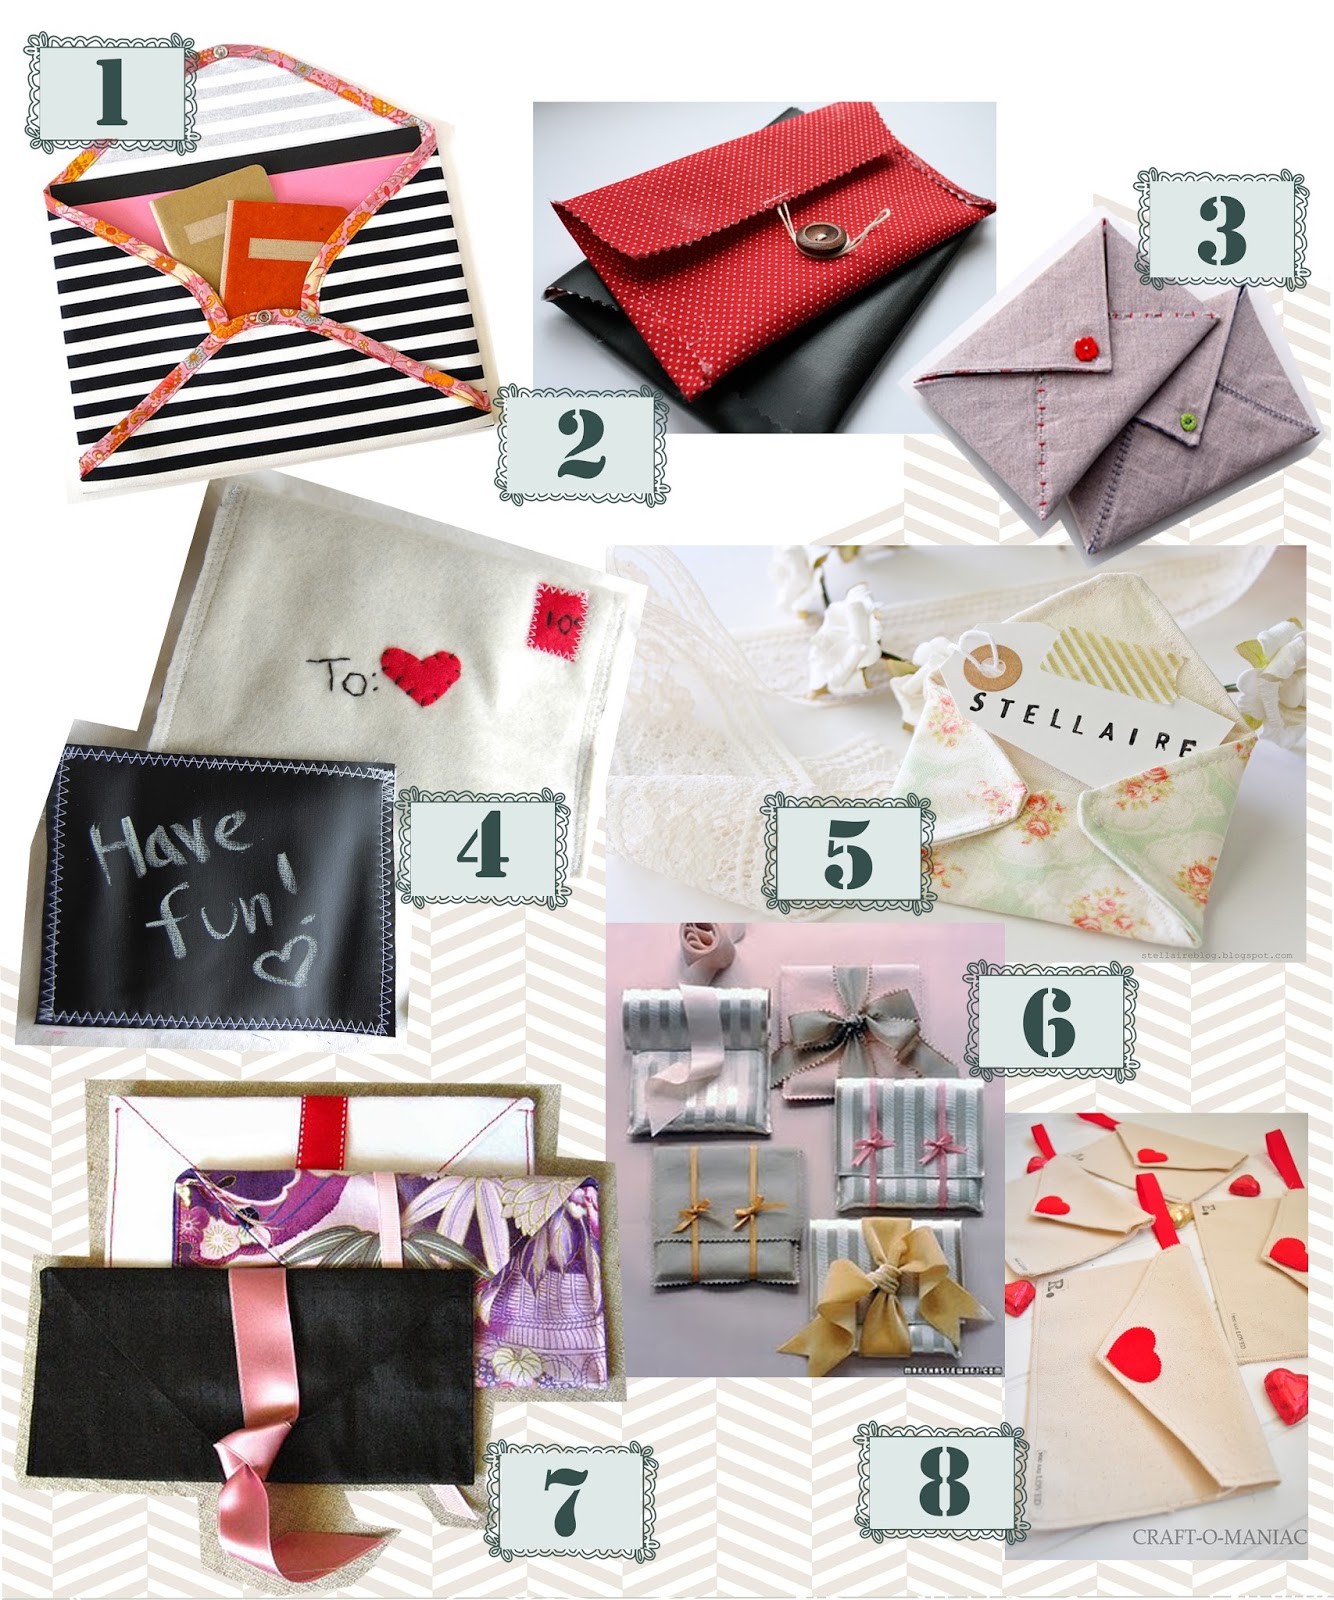
H and I are both big stationary geeks, we can spend hours in places like Paperchase. I Love it when I can combine my love of paper with fabric, this weeks Favourite Friday is no exception. Look at all these yummy fabric envelopes!
 I Love sending real letters and I love to receive post that isn't bills. I was surfing Pinterest the other day and came across some darling fabric envelopes, so I searched around for some DIY's to share with you. Here are my favourites.

Aren't they beautiful, I am going to rummage in my fabric stash to find some pretty fabrics to make some of these with.  On a foodie note, we have an exciting announcement to make soon, can't wait to share it with you all.  Also did you all catch the first episode of  The Great British Bake Off? If not catch the repeat this Sunday at 7pm or on iPlayer the first episode is all about Cake, yum. One of my favourite shops Hobbycraft have just launched a great range of products to accompany the series, why not hop over to their website and check out the range. Even better if you are looking to order anything this weekend Hobycraft have kindly offered us a discount code to get free standard UK delivery on all orders! Brilliant! 


Enter

FREEPOSTBH
at the check out to get free delivery!
 Free Standard UK Delivery on all Orders
Available until midnight on Monday 26th of August

What are you up to this weekend ? What will you be making?
Or will you be baking???
Sammy xxx