Make it: Children's Robot Jumper

A few weeks ago I thought I would get a bit creative for a friend of mine's little boy's birthday.  There is something so nice about making gifts for children, especially when you know they will really appreciate it.  I decided that instead of making something from scratch, I would customise instead.

So, I thought what better thing to do than to make a robot to applique onto a jumper that I had bought from H&M.  If you want to do something similar, then here is what you will need:  Jumper or T-shirt - you can find this jumper here, Felt - a few different colours, fabric glue, Googly eyes with shanks, scissors, pins, paper, pen/pencil, needles, embroidery thread, sewing thread and a sewing machine or very patient hand sewing skills.

Firstly, design your pattern on paper, I used squared paper to help with the straight angles for a robot, but use whatever works for you and your chosen design.  Then choose the colour of your base layer, I decided to make the robot out of grey and use 2 layers to make it really durable for a child's jumper.

After I had pinned the pattern piece to the felt, I cut it out and glued the two layers together with fabric glue to keep them from moving around.

I then made some buttons and other bits to make my robot a little more fun.  I glued these on and then made sure they would stay on, by sewing them on too.

I then cut two slots for the eyes and pushed my googly eyes through and attached the washers on the back.  I used these type of eyes instead of stick-on as I didn't want them to fall off!

I positioned my robot in the middle of the front of the jumper using pins and then began to zigzag stitch around all of the outside of the robot and over the middle panel to make sure it was all secure.  With hindsight I should have used Bondaweb to hold it in place on the jumper as it did end up moving about - even with using pins.

That's it.  Quite a simple customisation to do in a few hours of an afternoon and it makes a dull jumper look great.

Have you done anything like this recently, let us know in the comments or show us on Instagram or twitter by using #livelovemake.  We would love to see them.

H, xxx

Lilac is Back! Fashion Favourites Wishlist


1.Sunglasses by Topshop,  2.Converse trainers,  3.Anna Lou of London Necklace,  4.Fluffy cardigan by Vila,  5.Lilac Pantone Mug, 6.Lilac bag  by Accessorize,  7.Midi skirt by Asos,  8.Full Steam Ahead Essie polish.

It is no surprise if you have read this blog for a while that I love anything purple. So when the Pantone colour of the year was announced as 'Radiant Orchid', I was a happy bunny. But today I want to show off another shade of purple that is making it's (in my opinion long awaited) comeback this year... Lilac.

Forget the memories of 90's shiny satin bridesmaids dresses and Granny's lacy lavender bags, Lilac has had a slick makeover for it's return. Still soft and sugary but this time with a luxury twist. Matt textures, paired with strong metallics and neons, expect to see this sugar almond tone making it's way to the top of the pastel pile for spring.

What's your favourite colour for this spring going to be?

Sammy xxx

Sammy's Guide to Glues and Tapes

One thing I have bought a lot of over the years is Glue. The essential that can make a craft project a dream or a nightmare to complete. I have tried many types and lots of brands over the years and finally I have my favourites locked down. I thought it might be handy to create a little guide to help you find your go-to glues for any craft project.

Hilary's Blinds Country Crafts Competition...Win £1000

Photo Courtesy of Hillarys Blinds
Do you craft? Do you blog? Do you like fabric? Do you want the chance to win £1000????

We know that a lot of you guys do, so today we have a little craft competition especially for you, courtesy of the lovely Hillarys Blinds for the chance to win £1000!

Hillarys approached us to be judges for their Country Craft Competition for craft bloggers and we were so happy to be a part of it. We will be judging all the entries alongside Hilary from Craft Blog UKRosie & Hannah from The New Craft Society, Caroline from Burkatron and the Hillarys design team.  It is an honour to be on a panel with these inspirational, British, crafty ladies!  

To enter the competition, all you need to do is:

Pop over to the Hillarys competition page HERE.

Fill in the contact form and choose which one of the four Country Retreat fabrics you would like to use in your project. (they are free!)

A 1m x 1m piece of your chosen material will be sent to you.

Put your creative talents to the test by making an original craft project or design using the fabric and you can add any other materials you want for the project.

Here is where being a blogger is key... Publish a blog post with photos, describing how you made your entry and don’t forget to mention the competition page in your post.

Submit your entry by email to: dominic.bryce@hillarys.co.uk

The competition opens today, Monday 17th February 2014 and requests for fabric will close on Monday 17th March 2014.

You will have an additional 2 weeks after 17th March to make your blog post live. So you will be able to request fabric up until 17th March and then have until 31st March to publish your blog post and send the link over to Dominic.  The Winner will be announced on 14th April 2014.

When all submissions have been judged by Hillarys designers and the 'Craft Bloggers' panel, the winner will be contacted by email.

Hillarys have asked that you put the name of the blog where you found the competition in the ‘Where did you hear about the competition?’ section. So pop in Live it. Love it. Make it. if you saw it here <3

Hillarys were kind enough to send us some samples of the fabrics so we could give you some inspiration. We customised a denim jacket with the gorgeous Peacock design, with the help of some Bondaweb and sequin embellishments. Sammy made a fold over clutch bag from her favourite fabric and we covered a clipboard with some more of the peacock print. The fabric was so lovely to work with, not too heavy, but sturdy enough to be hard wearing. The colours are so lovely and the print quality is just superb.

If you want to see a tutorial on covering a clipboard in fabric head over to Claireabelle makes blog and check out the guest post from fellow judge Caroline (Burkaton).

We wish you all the best of luck and can't wait to see what you all make with Hillarys gorgeous fabrics! Don't forget to let us know too, you can tweet or Instagram us with #livelovemake so we can take a look.

H and Sammy xxx

Disclaimer: This post has been sponsored by Hillarys Blinds.  We believe in honesty of relationship, opinion and identity. 

Make it: Quick and Easy Valentines Carpet Picnic

Today is Valentines Day, just in case you had forgotten and if you are like me you will have.  It is a God-send that my Steve's birthday is the same day as mine, otherwise he wouldn't stand a chance of being remembered, I am truly awful at remembering dates. If you are like me and have forgotten to sort something for your loved one tonight I have a suggestion that will get you lots of brownie points! A carpet picnic. The supplies only take a quick trip to the supermarket and a little careful preparation, perfect for those of us with busy lives and a memory like a sieve. This would also be great if you are having a girls/guys anti Valentines get together. 

I popped to the supermarket and picked up a few of Steve's favourite snacks and a couple of Valentines themed goodies. 

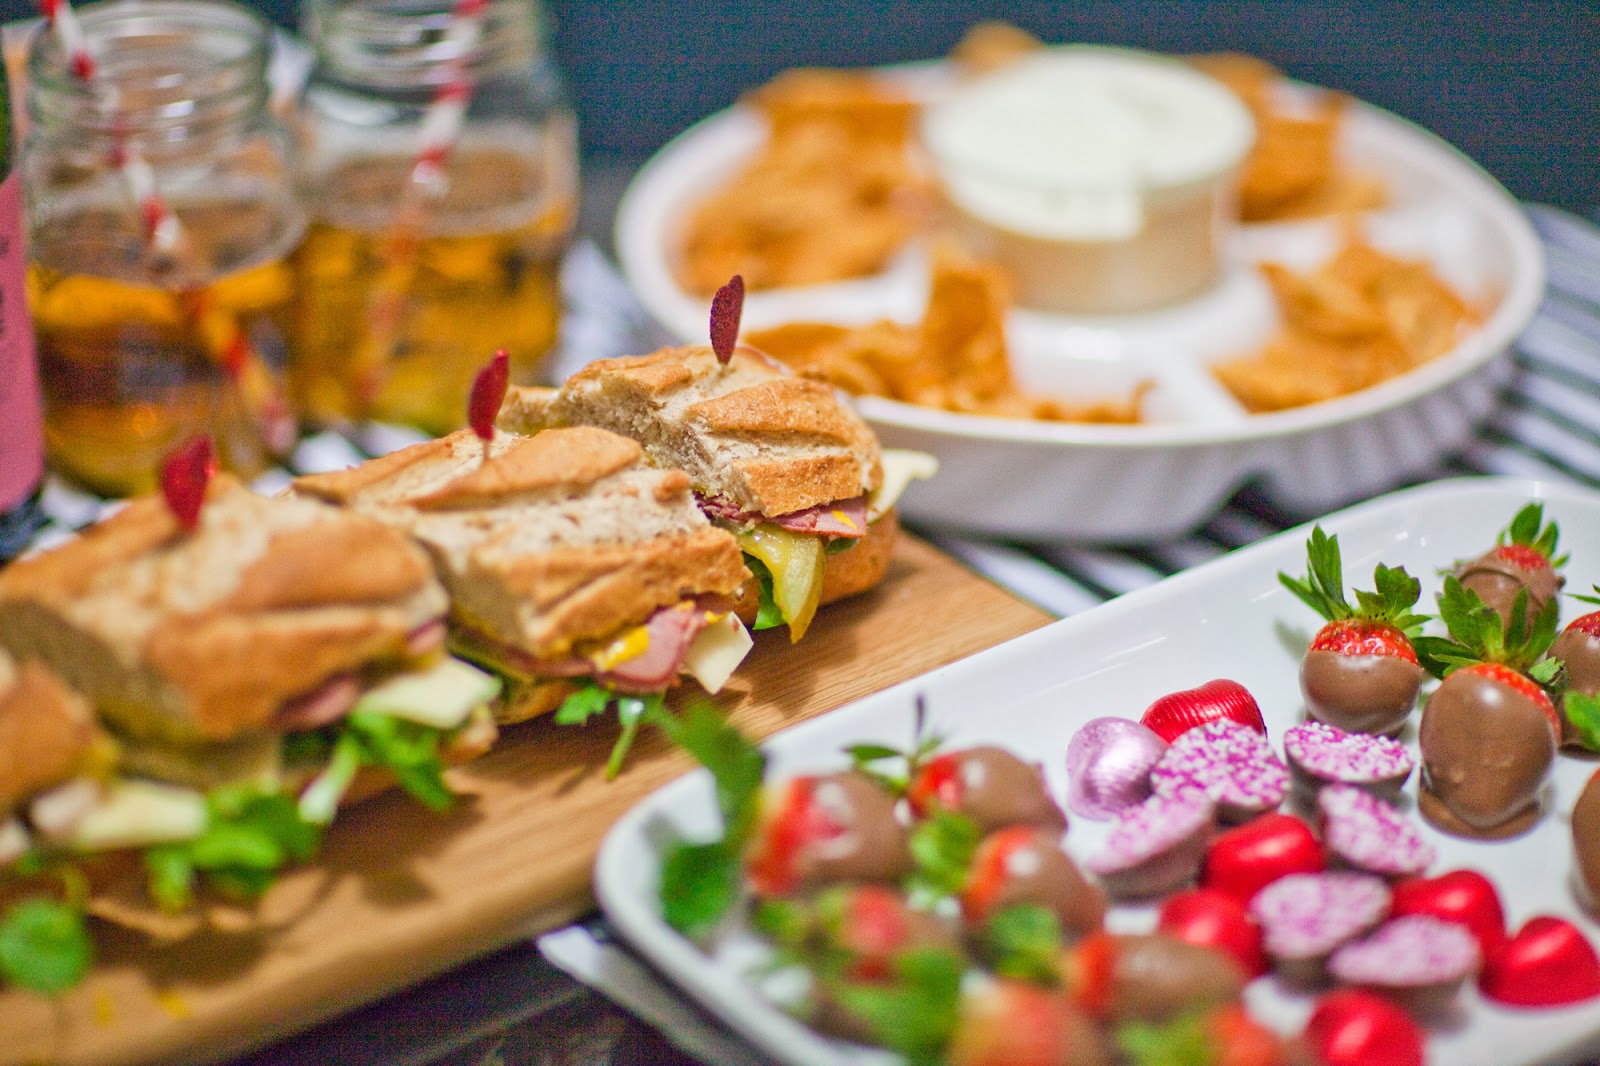
We both love strawberries and chocolate covered ones are perfect for a picnic, and very quick to prepare. Simply melt your favourite chocolate, dip your strawberries in and set them down on some baking paper in the fridge to set. They look impressive, even if they aren't perfect and taste great.

I picked up some of Steve's favourite picnic foods in miniature and arranged them restaurant style on a serving dish. Paying attention to presentation shows that you have spent time and make the little things more special.

I chose some fancy drink and fished out some red straws to make it more Valentines-y.  I displayed all our food on our coffee table in our lounge with a couple of small table cloths in lieu of a rug on the ground.

Our main dish was a sharing sub. I filled a small farmhouse loaf with our favourite fillings, each half with different flavours and cut it in to chunks. I kept it together with these cute heart cocktail sticks and displayed it on a cutting board to make it look more fancy.

I popped the strawberries out of the fridge and put them and some Valentines chocolates on another serving dish for desert.

This little feast was so easy and quick to prepare. A total Valentines save for anyone who has forgotten to do something special in advance. Your special someone will be impressed with the time you have taken to get everything ready and the thought that went into it, they don't need to know it was a last minute thing. If you want something altogether sweeter check out the sweetie platter I made last year.

We had our picnic last week, just in-case you were wondering, as we are at Steve's parents house for dinner tonight. What do you guys have planned for Valentines??

Happy Valentines day to you all

Sammy xxx

Who's Who: Hand Over Your Fairy Cakes


This month, we chat with the designer/Maker from Hand Over Your Fairy Cakes, who we saw when we went to Renegade last year and so we thought it would be great to find out a bit more about Sally and her work.

Who are you?
I'm Sally McAdam from Hand Over Your Fairy Cakes.  I live in Glasgow with my boyfriend and my cat Chi where I design and make jewellery. I also play a lot of roller derby, read a lot of comics, play too many video games, bake a million cakes, drink gallons of tea and sometime even find time to go to work at my full time job in a hospital. I'm not entirely sure how, I'm exhausted just reading that sentence. Well, I do most of these things in my pyjamas.

What do you do?
I make laser cut jewellery from acrylic and wood. I start by doodling my designs on a piece of paper, then I use a vector program to draw paths for the laser to cut and engrave. I send these to a company who run them through the laser cutter for me (I'm too poor to buy my own at the moment, but maybe I'll win the lottery or have a distant, incredibly rich, elderly relative die and leave me their fortune or something. I'll probably just save up.) The company send me the cut pieces and I peel the protective layer off each tiny piece and glue them together to make necklaces, brooches and earrings, hurrah.

I like to make fairly adventurous and sometimes complex designs in several layers of acrylic. I think this can make the laser cutting companies I use go a bit cross eyed. I feel sorry for them. Sorry guys. Sometimes my initial designs don't fit together/fall to bits/just look rubbish and I have to adjust them or start again, but it feels pretty awesome when I can eventually hold something in my hand that started out in my head.

How did you start?
I started out making jewellery with beads and things, mainly charm bracelets and ridiculous necklaces consisting mainly of paperclips. I started selling it, mainly to stop it all piling up in my living room and making it difficult to see the TV, but I was surprised when people actually wanted to BUY it. Soon I decided I wanted to make my own designs and after researching it, it seemed the best way to get what I wanted was laser cutting. I taught myself to draw vector paths (this sounds impressive but "self-taught" in this case means "googled-it-when-I-was-stuck"), started off with some simple designs and took it from there.

 
What's Next?
I LOVE designing new jewellery and I've got my first 2014 collection well underway. I've just made a prototype of our new Otter Spotter Necklace, I can't wait to release it. We've just sent an order to our first ever international stockist in Germany, I'm looking forward to trying for even further afield. 

What advice would you give yourself if you could go back to the beginning?
Be brave! If you want to make a certain thing, but it looks difficult, just try! If you want a particular shop to stock your stuff, just ask!

Get a decent, organised storage system for your products and loose acrylic parts, I am finally getting round to this several years too late and I wish I'd done it years ago, I'd have saved myself a lot of agonising foot injuries standing on tiny, tiny parts.

You are allowed to make jewellery and still have a proper job and you are allowed to love both of those things. So many people say they'd love to give up their day job to craft all day, but I love having both in my life!

We think that Sally has the right idea in enjoying all her passions in life, whether they be creative or not.  It is amazing what can influence you and what you see everyday can help with your work.  Always keep a notebook with you so that you can write or doodle when you are on the go, as you never know when you are going to get that inspiration moment!

These would also make great gifts for Valentine's Day, although you may be lucky to get it in time - a post Valentines gift would work!

H & Sammy